By CHRIS McGOWAN

By CHRIS McGOWAN

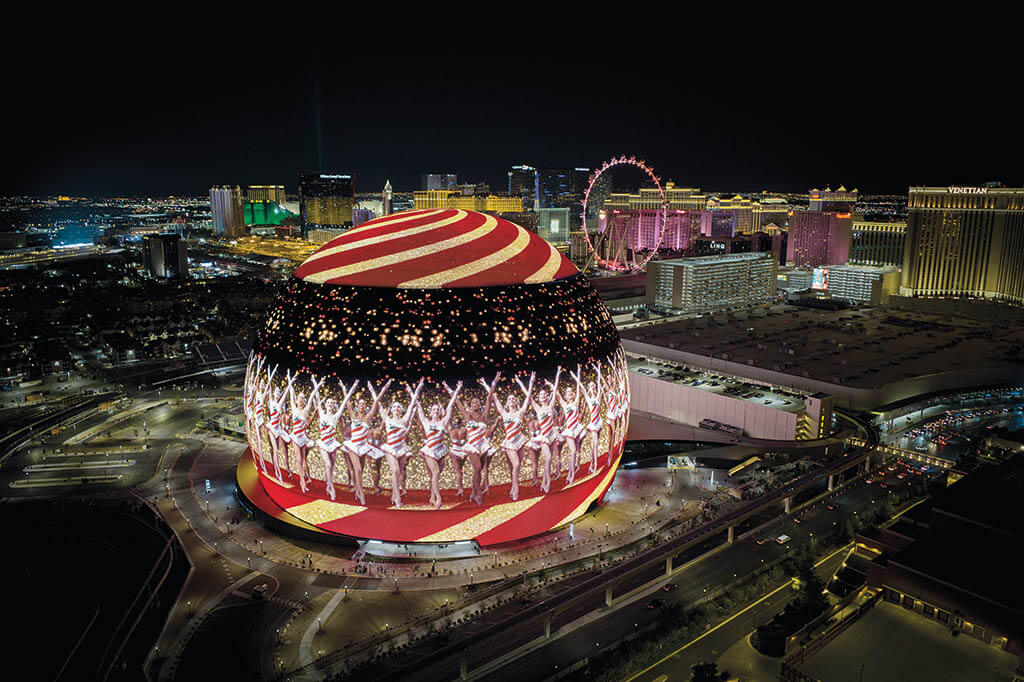
The newest addition to the Greater Las Vegas skyline is the 366-foot-tall Sphere. Its exosphere, the exterior shell of Sphere, has 580,000 square feet of LED panels that morph into all types of images. Sphere’s images range from a giant eyeball and leaf-like color bursts to an architectural lattice and a vivid moon. The Rockettes’ kicking and dancing also fill the Sphere and seem particularly well-suited to light up a Las Vegas night. (Photos courtesy of Sphere Entertainment)
On the outskirts of the Las Vegas Strip, a 366-foot-tall eyeball gazes out at the urban landscape. The traffic-stopping orb, simply named Sphere, has an exosphere of 580,000 square feet of LED panels that morph into the moon, an immense pumpkin, vast fireworks and much more.
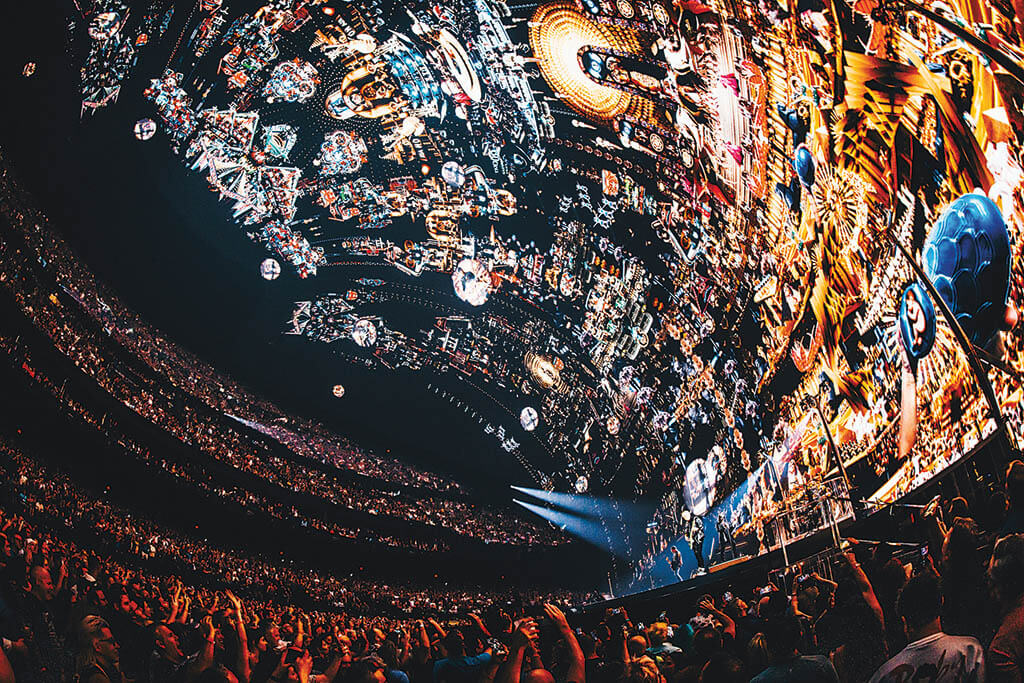
While the exterior of Sphere is now an imposing part of the Greater Vegas skyline, its interior is an immersive, scaled-up entertainment destination with seats for 17,600+. Films, concerts and events are displayed on the largest high-resolution LED screen in the world, an arena-sized canvas for live action and visual effects.
The wraparound 16K x 16K resolution interior display is 240 feet tall, covers 160,000 square feet and is comprised of 64,000 LED tiles manufactured by Montreal-based SACO Technologies. The audio system, powered by Berlin’s Holoplot, uses 3D audio beam-forming technology and wave-field synthesis. Sphere Entertainment’s $2.3 billion project was designed by global architectural design firm Populous.
Sphere Entertainment developed bespoke technology for the outsized format, including its Big Sky 18K x 18K, 120 fps camera system. The Sphere Studios division’s main Burbank campus is dedicated to production and post-production of visuals and mixing of immersive audio for Sphere and houses Big Dome, a 28,000-square-foot, 100-foot-high geodesic dome that is a quarter-sized version of Sphere, for content screening.
The rock band U2 inaugurated Sphere with a five-month-plus residency for “U2: UV Achtung Baby Live at Sphere,” and showed off the venue’s vast creative possibilities for live shows. Director Darren Aronofsky’s immersive 50-minute film Postcard from Earth, which debuted soon after U2’s launch, tells the story of our planet seen from the future. Postcard used the Big Sky camera as well as Sphere’s 4D technologies, including an infrasound haptic system to simulate the rumbles of thunder or a rocket launch and sensory effects like breezes and scents.

Nevada’s most endangered species crowd Sphere’s interior in Es Devlin’s “Nevada Ark” for U2’s show. (Photo: Es Devlin. Courtesy of disguise and U2)
“At its best, cinema is an immersive medium that transports the audience out of their regular life, whether that’s into fantasy and escapism, another place and time or another person’s subjective experience. The Sphere is an attempt to dial up that immersion,” Aronofsky wrote in a press release.
Soon after Sphere’s opening, Autodesk and Marvel Studios teamed up to create an ad celebrating the former’s software and The Marvels film for an Autodesk customer event in Las Vegas. The Mill helped with the VFX, utilizing the Autodesk tools Maya and Arnold. The segment featured a gigantic Goose the flerken (a cat-like creature that transforms into a monstrous alien) on the exterior of Sphere, another massive visual certain to draw attention for miles around.
7thSense provides Sphere’s in-house media servers, processing and distribution systems utilized fully on Postcard from Earth. They are the venue’s main playback system. For “U2:UV,” the visuals were coordinated by Treatment Studio and powered at Sphere by a disguise playback system.
U2 AT SPHERE
Brandon Kraemer served as a Technical Director for Treatment Studio on the “U2:UV” residency at Sphere. He comments, “The unique thing that Sphere brings to the concert experience is a sense of immersion. Given that it’s a spherical image format and covers much of your field of view – and it’s taller than the Statue of Liberty on the inside – means it becomes an instant spectacle, and if you leverage that for all its uniqueness, you can’t help but blow audiences’ minds.”
Kraemer recalls, “Willie Williams [U2 Creative Director and Co-Founder of London-based Treatment Studio] contacted me in September of 2022 about the project. That was very early on in the process. Early creative was being discussed then, but just as importantly we started to embark on just how we were going to technically pull this off.”
Kraemer continues, “The majority of the visuals were designed by the artists at Treatment under the creative direction of Williams and Producer Lizzie Pocock. However, there were other collaborators on key pieces as well. Khatsho Orfali, David Isetta and their team from Industrial Light & Magic created an amazing cityscape that deconstructs itself for U2’s new song ‘Atomic City.’ And, he adds, “Marco Brambilla and his team at The Mill in Paris created a unique world for ‘Even Better Than the Real Thing,’ a dense psychedelic collage.”


The newest addition to the Greater Las Vegas skyline is the 366-foot-tall Sphere. Its exosphere, the exterior shell of Sphere, has 580,000 square feet of LED panels that morph into all types of images. Sphere’s images range from a giant eyeball and leaf-like color bursts to an architectural lattice and a vivid moon. The Rockettes’ kicking and dancing also fill the Sphere and seem particularly well-suited to light up a Las Vegas night. (Photos courtesy of Sphere Entertainment)


To capture large-scale, ultra-high-resolution imagery, Sphere Entertainment’s Burbank-based unit, Sphere Studios, developed the 18K x 18K, 120fps Big Sky camera system, used in spectacular fashion by Darren Aronofsky’s Postcard from Earth. (Photo courtesy of Sphere Entertainment)
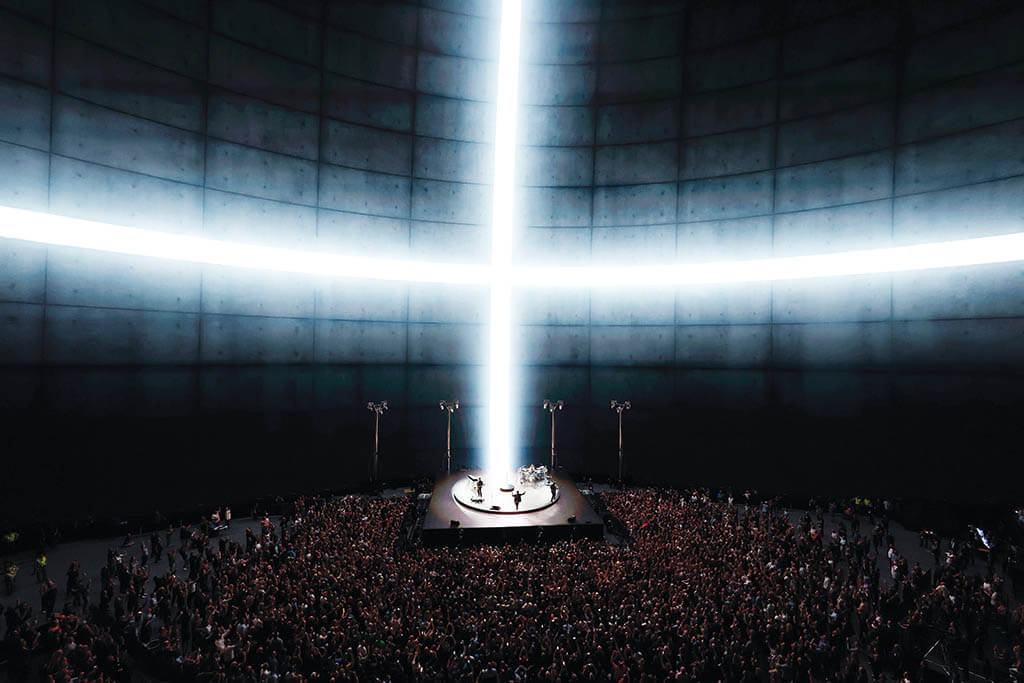
A massive cross of light is a simple but powerful visual at this scale, part of the band’s “U2: UV Achtung Baby Live at Sphere” residency. (Photo Kevin Mazur. Courtesy of disguise and U2)
There were numerous technical challenges and quite a few diplomatic challenges as well, and these two areas often overlapped. Kraemer explains, “Opening a building and working in a construction site while stepping through rehearsal programming is quite a feat. My hats off to U2’s legendary Production Manager, Jake Berry, for keeping the whole operation moving forward in the face of what were, at times, some serious headwinds. Getting content rendered on that screen has lots of challenges along the way, and we were also very fortunate to have the support of disguise and their [GX 3] servers as the backbone of the playback system. We couldn’t have produced the show we did without their support.” In addition, the show utilized a custom stage, based on a turntable design by Brian Eno, and covered by Yes Tech and ROE panels.
U2’s reaction was very positive, according to Kraemer. “The band put a lot of trust in the teams that Willie Williams put together, and they were pretty blown away by it all.”
DISGUISE
Peter Kirkup, disguise’s Solutions and Innovation Director, recalls, “We first became involved in Sphere through [U2’s Technical Director and Video Director] Stefaan ‘Smasher’ Desmedt. Together with Smasher, disguise has been working on U2 shows for decades, so it was a perfect fit.”
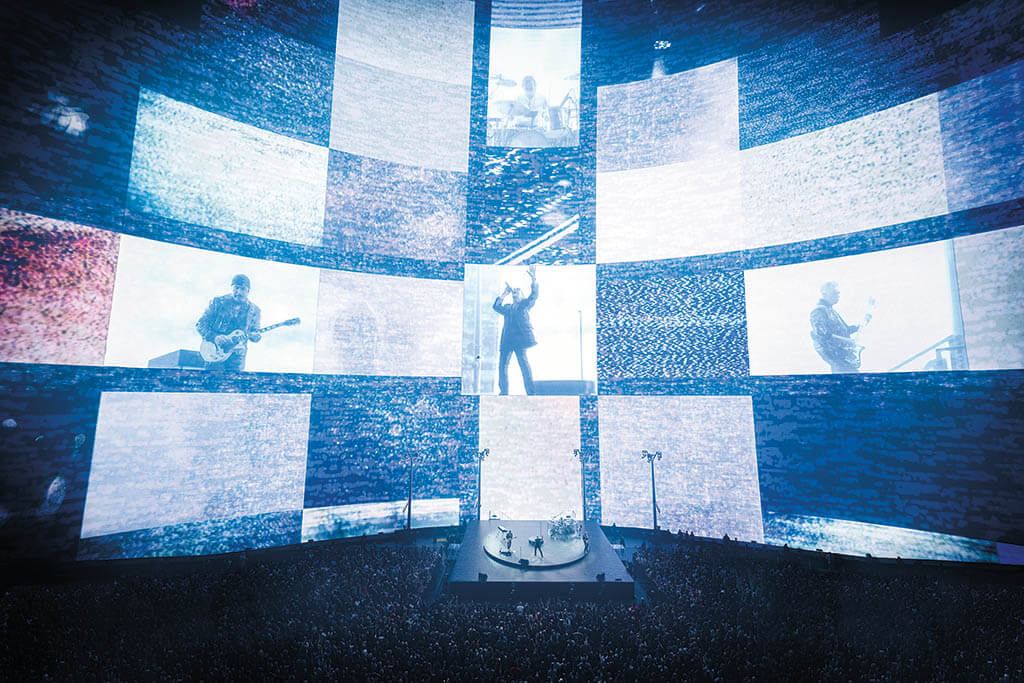
Kirkup adds, “Disguise’s software and hardware powered the visuals that were displayed on Sphere’s wraparound LED screen during the U2 show. First, our Designer software was used to help previsualize and edit the visual content – all brought together by the creative minds at Treatment Studio, including Brandon Kraemer and Lizzie Pocock as well as Willie Williams.”
Disguise’s Designer software allowed the creative team to previs their visuals on a computer with the help of a 3D digital twin of the Sphere stage. “This real-time 3D stage simulator meant ideas could be communicated more clearly and quickly to get everyone on the same page,” Kirkup notes. “Designer also helped the team to sequence the visuals into a timeline of beats and bars – and import audio to lock visuals to the beat. This helped create snappy, rhythmic edits and some extra looping segments that could be pulled in on the fly in case the band decided to do an extra riff on the day of the show.”
Kirkup continues, “Once the visuals were complete, our software split and distributed the 16K video into sections. We were working with one contiguous LED screen but still needed to split the video into sections because of the sheer volume of content involved. We were playing real-time Notch effects and pre-rendered NotchLC content at 60fps across the Sphere’s 256,000,000 pixel, 16K x 16K interior canvas.
“Finally, our GX 3 media servers enabled all individual pieces to be perfectly in sync throughout the show,” Kirkup says. “This technology also allowed us to composite layers of video together in real time. For example, the video feed of the band that cinematic cameras were capturing during the show could be composited into our LED visuals from the Designer software. Each server was also upgraded with a 30-terabyte hard drive, so we had local storage machines for playout and 100GB networking back to the content store for file transfers and media management.”
Kirkup adds, “We furthered our Single Large Canvas workflows, which enable content to be broken up into pieces and distributed across a cluster of machines – essential work to make a project like this come to life. We also introduced some custom color pipeline work for Sphere, adapting our standard color pipeline to match the unique characteristics of the in-house LED system.” Adds Kirkup. “A big challenge was handling such a large volume of content across 256,000,000 pixels – in real time. There were 18,000 people watching the show, and they all had their camera phones ready to broadcast to even more people, so we really had to make sure the show went well.”
Kirkup remarks, “Bono mentioned this during the show, but I believe the most important thing about Sphere is that for the first time, a venue of this scale is being created with musicians in mind. In the past, musicians needed to squeeze into sporting arenas or stadiums that weren’t created for music – they may have had tiny screens or the wrong acoustics. With Sphere, that’s all changed. For real-time graphics and VFX artists, that’s a big trend to watch for in 2024 and beyond. I expect to see more venues designed specifically to highlight 3D visuals. With that, more VFX artists and studios will be pulled in to develop not only movie and TV effects – but incredible visuals for live events, too. The two industries will start to blur.”
7THSENSE
7thSense – a creative software and technology company based in Sussex, England – put together the Sphere in-house playback system and provides hardware for media serving, pixel processing and show control. “Building a first-of-its-kind venue like Sphere brought with it a significant number of challenges that the 7thSense team was keen to dig their collective fingers into,” explains Richard Brown, CTO of 7thSense.
Brown notes, “Managing exceptionally large canvases of playback, generative and live media as a single harmonious system is of utmost importance in a venue of this scale, and it is a workflow and underpinning technology we have been working on for quite some time. With a 16K x 16K canvas size, Sphere placed a priority on accelerating the development of the tools for media playback, multi-node rendering of generative assets and live compositing from multiple ST 2110 streams, as well as for pre-visualizing the show without having access to the full system. Because time in the venue is an incredibly rare commodity, anything that can be done ‘offline’ helps to make the time in the venue more productive.”

The visuals for U2’s “Atomic City,” with VFX work by ILM, includes a stunning deconstruction of Las Vegas going back in time. (Photo: Rich Fury. Courtesy of disguise and U2)

The desert landscape around Las Vegas became a backdrop for U2’s “Atomic City.” (Photo: Rich Fury. Courtesy of disguise and U2)
Marco Brambilla’s dense psychedelic collage “King Size,” put together with the help of the Mill in Paris, is an ode to Elvis Presley that accompanies the U2 song “Even Better than the Real Thing.” (Photo: Rich Fury. Courtesy of disguise and U2)

The interior display of Sphere is 240 feet tall and covers 160,000 square feet with LED panels from SACO Technologies. (Photo: Rich Fury/Ross Andrew Stewart. Courtesy of disguise and U2)
The interior display of Sphere can create huge individual displays for any performer, and the venue uses 3D audio beam-forming technology and wave field synthesis for an appropriately big and precise sound. (Photo courtesy of disguise and U2)

The huge $2.3 billion Sphere has altered the Greater Las Vegas skyline and become an entertainment destination, celebrating its launch in September 2023 with the “U2: UV Achtung Baby Live at Sphere” residency. (Photo courtesy of Sphere Entertainment)
Brown adds, “High-speed streaming of uncompressed media from Network Attached Storage (NAS) is something we have been wanting to do for a long time, but the technology was not sufficiently advanced to support the bandwidth and timely delivery of data until very recently. Fortunately, the use case for this technology aligned very much with the desired workflow at Sphere, giving us the chance to really dig into what could be an industry-changing technology for media production and presentation systems.”
Brown continues, “Managing synchronized media playback across dozens of servers is one thing, but making it straightforward for a show programmer to build the show that spans dozens of servers is quite another. 7thSense developed an Asset Logistics workflow that simplifies what actual movie frames each server streams from the NAS based on representative meta-media used for programming the show timeline.”
Brown explains, “Each server is configured with what section of the dome it is responsible for playing back, and this information, coupled with the name of the movie from the timeline, is used to determine the file path on the NAS that each media server uses to access the appropriate movie frames. This workflow reduces user error and makes timeline programming significantly faster than managing individual movies per server.”
Brown comments that Sphere is the first entertainment venue of its kind when it comes to the size and resolution of the media being presented to an audience. He says, “It is imperative that all media players, generative engines and pixel processors are working in absolute synchronization, or the illusion of immersion is lost for the audience. Worse than that, image tearing or jitter, could cause the audience to become ill because of the immersive nature of the media plane. Everywhere you look, you are surrounded by the media.”
In addition, Brown notes, “Not only is it our first major application of ST 2110, it just happens to be the largest ST 2110 network in an entertainment venue on the planet!” 7thSense has been in the world of immersive presentations in planetaria, domed theaters, museums and theme park attractions since going into business nearly 20 years ago. But what has been created at Sphere is something new, a destination live-event venue, and the technology far surpasses what has been built to date. This hybrid type of entertainment has the potential to create its own category of immersive live show experience. It’s exciting to be part of the team building it from the ground up.”
“I think it’s an experience like no other,” Treatment Studio’s Kraemer says about Sphere. “It was a thrilling experience to be part of the first creative team to produce an amazing show there.
I think ‘U2:UV’ will be a very tough act to follow, but I think there is a tremendous opportunity to give an audience something that is impossible in a stadium or arena show, and I look forward to seeing how this all evolves.”
Chris McGowan
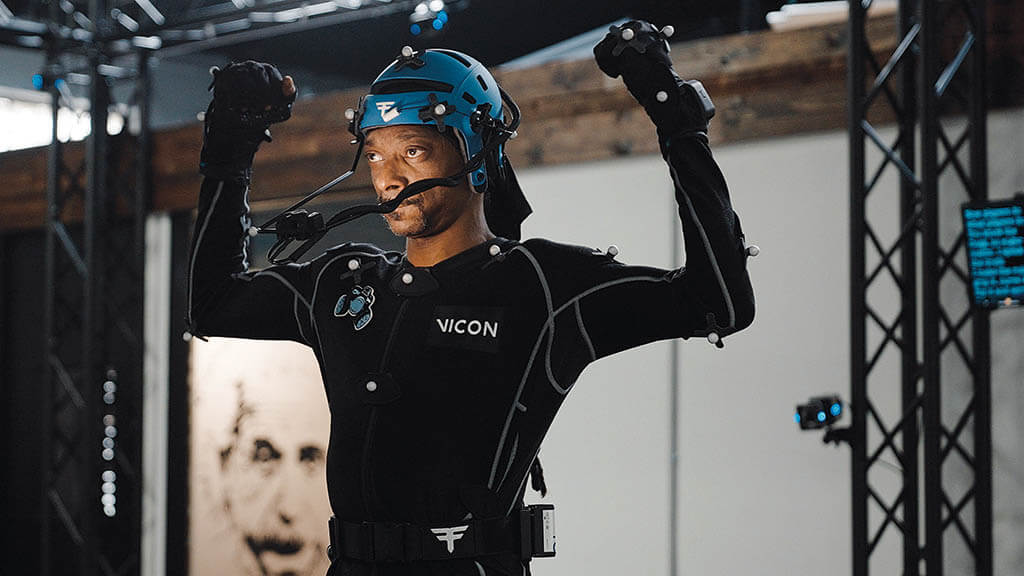
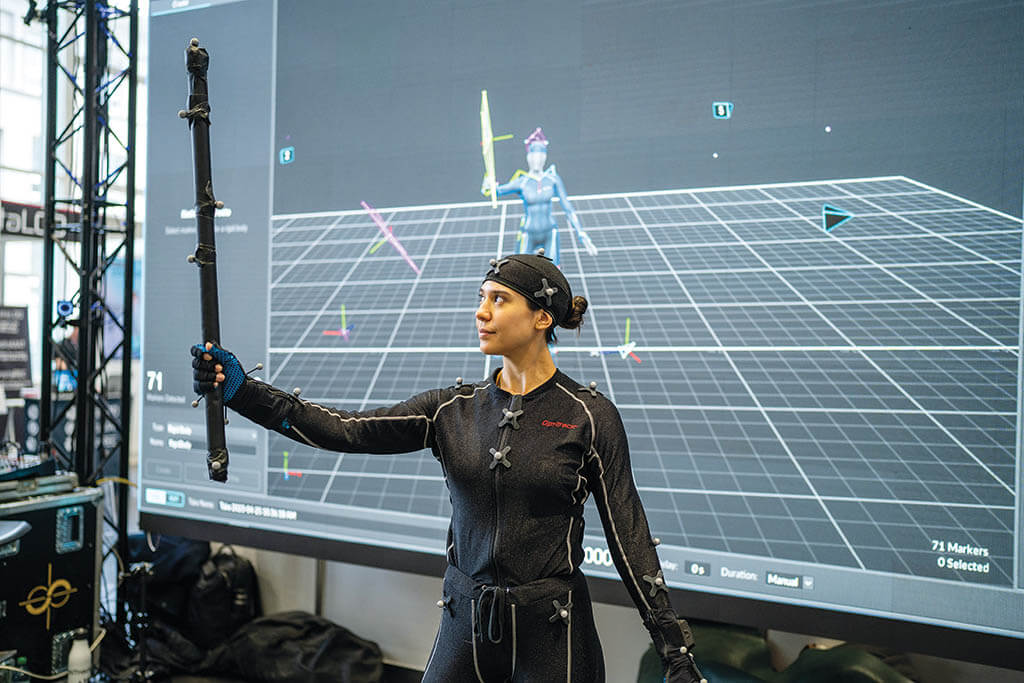
Snoop Dogg at Astro Project motion capture studio in Santa Monica for his “Crip Ya Enthusiasm” music video utilizing the Vicon system and StretchSense gloves. (Image courtesy of Vicon and Astro Project, LLC)
Motion capture, performance capture and volumetric video technologies are rapidly advancing, incorporating AI and ML to a greater extent and focusing on enhancing realism, precision and accessibility. Peter Rabel, Technical Product Manager at Digital Domain, comments, “The trend towards real-time capabilities has become prominent, allowing for immediate feedback and integration into virtual environments, video games and live events. As we integrate artificial intelligence and machine learning as tools to enhance these functions’ capabilities further, it will enable automated analysis and capture of movements in real-time, which will help save time on the process, leading to cost savings. It’s essential for us to stay updated on recent developments and industry trends to understand the current trajectory of these capture technologies as technology continues to evolve so we can better serve our clients.”
VICON: MARKERLESS
Vicon made a splash in 2023 with its Los Angeles SIGGRAPH announcement of the debut of its machine learning (ML) powered markerless mocap. The news came after some three years of research and development focusing on the integration of ML and AI into markerless motion capture at Vicon’s R&D facility in Oxford, U.K. Vicon collaborated on the technology with Artanim, the Swiss research institute that specializes in motion capture, and Dreamscape Immersive, the VR experience and tech company.
“The ability to capture motion without markers while maintaining industry-leading accuracy and precision is an incredibly complex feat,” says Mark Finch, Vicon’s Chief Technology Officer. “After an initial research phase, we have focused on developing the world-class markerless capture algorithms, robust real-time tracking, labeling and solving needed to make this innovation a reality. It was our first step towards future product launches, which will culminate in a first-of-its-kind platform for markerless motion capture.”

On the mocap set of She-Hulk: Attorney at Law with diode suit and Digital Domain’s Charlatan “face-swapping” system. (Photo: Chuck Zlotnick. Courtesy of Marvel Studios)
Finch continues, “What we demonstrated at SIGGRAPH was markerless recognition of the human form – using prototype cameras, software and algorithms – to track six people, with their full body solved in real-time, in a VR experience. This completely the need for participants to wear heavy gear with motion capture markers. As a result, the VR experience is more seamless and believable as the motion capture technology is largely invisible and non-invasive.” Finch adds, “Of the technology we showcased, Sylvain Chagué, Co-Founder and CTO of Artanim and Dreamscape, said, ‘Achieving best-in-class virtual body ownership and immersion in VR requires both accurate tracking and very low latency. We spent substantial R&D effort evaluating the computational performance of ML-based tracking algorithms, implementing and fine-tuning the multi-modal tracking solution, as well as taking the best from the full-body markerless motion capture and VR headset tracking capabilities.’ ”
ROKOKO VISION
Based in Copenhagen, Rokoko had two major announcements on the product front in the last year, “First, with Rokoko Vision, our vision AI solution that allows for suit-less motion capture from any camera. We released the first iteration mainly to get to know the space and gather insights from early use of the product,” CEO and Founder Jakob Balslev comments. “It’s becoming increasingly clear to us what the users need, and we are excited to release more updates on that front.
Rokoko’s Coil Pro is the company’s recent innovation in motion capture hardware, featuring no drift and no occlusion through a fusion of EMF and IMU capture. (Image courtesy of Rokoko)
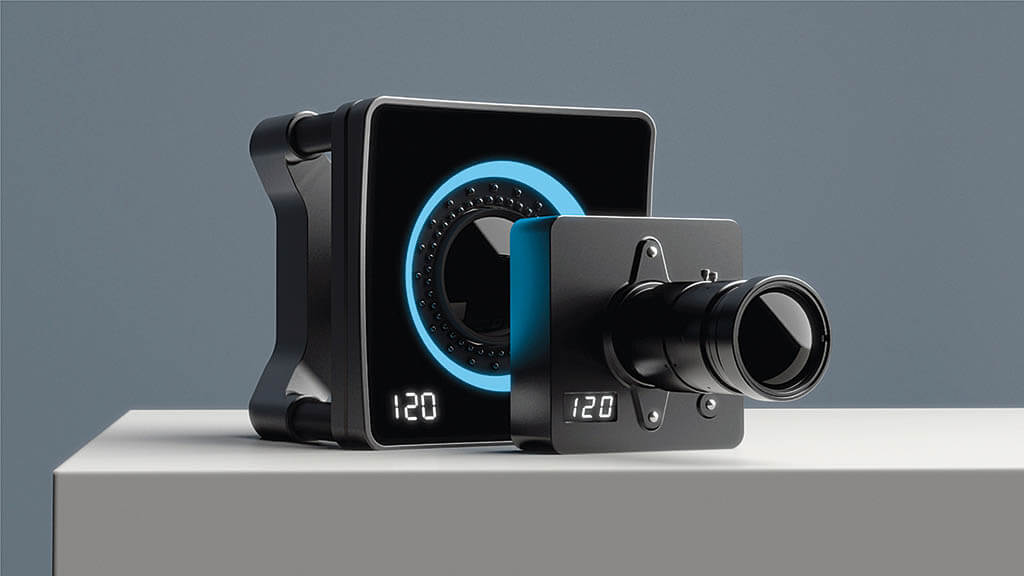
OptiTrack’s Primex 120 and Primex 120W cameras offer the company’s longest camera-to-marker range for Passive and Active markers. OptiTrack accuracy with more range enables very large tracking volumes for a wide variety of training and simulation scenarios, extreme ground or aerial robotic facilities and larger cinematic virtual production studios. (Image courtesy of OptiTrack)
OptiTrack’s Primex cameras quickly identify and track Passive and Active markers. (Image courtesy of OptiTrack)
He adds, “Second, we unveiled our Coil Pro – the biggest innovation we’ve ever done on the hardware side – and, in my eyes, probably the biggest innovation ever in motion capture. Through a fusion of EMF and IMU capture, the Coil Pro unlocks the holy grail of motion capture: No drift and no occlusion. With drift-free global position over time and no need for line of sight from optical solutions, the Coil Pro is the best of both worlds of mocap [IMU and optical]. The underlying platform, named Volta Tracking Technology, fuses EMF and IMU and will be at the core of all our motion capture hardware solutions going forward.”
DIGITAL DOMAIN: CHARLATAN
Digital Domain is further developing its machine learning neural rendering software Charlatan (sometimes referred to as a face-swapping tool). “Acknowledging the expense and time associated with traditional methods, including our top-tier Masquerade [facial capture] system, we developed Charlatan to introduce efficiency and affordability,” Rabel comments. “Several years ago, Charlatan was created using machine learning techniques. This innovative approach involves utilizing real photography of an individual’s face and applying enhancements, seamlessly transferring it to another person’s face, or even manipulating discrete aspects such as aging or de-aging. Recently, we have been developing Charlatan 3D, which evolves this technology to produce full 3D geometry from this process but at a lower cost and simpler capture conditions than Masquerade. In essence, Charlatan represents a significant stride towards streamlining the creation of lifelike digital humans with unparalleled realism.”
OPTITRACK: NEW CAMERAS
OptiTrack provides tracking solutions that vary in use, including AAA game studios, medical labs, and consumer and prosumer budget solutions. In November the firm announced its three most advanced motion capture cameras; the PrimeX 120, PrimeX 120W and SlimX 120. “With higher resolution and increased field of view, these new additions enable larger tracking areas for a wider variety of training and simulation scenarios and larger cinematic virtual production studios,” says Anthony Lazzaro, Senior Director of Software at OptiTrack. All three cameras, which are designed and manufactured at OptiTrack’s headquarters in Corvallis, Oregon, feature their highest-yet resolution, 12 megapixels. With the PrimeX 120, customers benefit from a standard 24mm lens while the PrimeX 120W comes with an 18mm lens with a wider field of view. [And] we have 24mm or 18mm wide lens options available with the Slim X 120.”
Lazzaro continues, “We also released a more informative and intuitive version of our mocap software, which is now compatible with all OptiTrack mocap cameras. Motive 3.1 is aimed at simplifying high-quality, low-latency performance motion tracking, offering users easy-to-use presets and labeling for tracked items that deliver the best possible motion data while saving time and eliminating extra steps. Customers also have greater visibility into possible issues and can automatically resolve against the harshest of tracking environments.”
STRETCHSENSE: MOCAP GLOVES
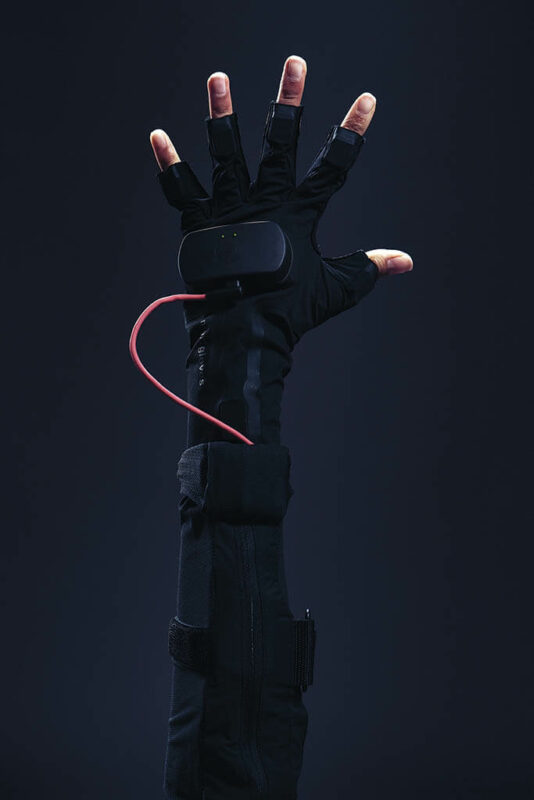
Founded in Auckland in 2012, StretchSense took on the mission to build the world’s best stretchable sensors for comfortably measuring the human body. “Building on top of our sensor technology, in 2019 we pivoted the business to focus on motion capture gloves for AAA studios, indie studios, streamers, VR/AR, live shows and more,” explains StretchSense Co-Founder and VP Partnerships & New Markets Benjamin O’Brien.
“Our Studio Gloves are incredibly unobtrusive, with a less than 1mm thick sensor layer on top of breathable athletic fabric, and a small transmitting module,” O’Brien says. “This is more than just a comfort and style thing though; it means that our gloves don’t get in your way, and you can continue to type, use a mouse, hold a prop, use your phone or just get a pizza from the door. Once you start to think about mixed-reality applications, this becomes even more critical, as our gloves allow you to switch seamlessly between interacting with virtual spaces and the real world.”
O’Brien adds, “Our mission is to democratize motion capture, allowing independent content creators and streamers to create incredible and immersive stories and experiences. To achieve this, we have a long-term goal of getting our gloves down to a true consumer price point, which will really open up the space. At $795, we think our latest StretchSense Studio Glove is the biggest step the industry has ever taken towards this goal; less than two years ago, something with similar performance would have cost well over $5,000.”
ARCTURUS AND VOLUMETRIC VIDEO
Based in Beverly Hills, Arcturus Studios was founded in 2016 by veterans of DreamWorks, YouTube, Autodesk, Netflix and other notable companies. “Together, they saw the potential for volumetric video and decided to work together to steer its development,” recalls Piotr Uzarowicz, Head of Partnerships and Marketing at Arcturus. “That led to the creation of the HoloSuite tools, consisting of HoloEdit – a tool that can edit the 3D performances of performers recorded with volumetric video – and HoloStream, software that can compress a completed volumetric video file and stream it to any 2D or 3D device, even if the broadband signal is unstable. Together, HoloSuite has helped make it possible to use volumetric video for everything from e-commerce to AR projects to virtual production and more.”
Uzarowicz continues, “Arcturus took over Microsoft’s Mixed Reality Capture Studios (MRCS) business [in 2023], including the development of that capture system – the most sophisticated in the world – as well as the rights to maintain and supply MRCS licenses to studios around the world. That has put Arcturus in a unique position where it is now developing for all stages of volumetric video, from the capture and editing all the way to the final distribution.”
“One of our goals has always been to make volumetric video more accessible. We’re looking at new ways to make it easier to capture volumetric videos using fewer cameras, including the use of AI and machine learning. With the MRCS technology and our licensees, we are working with some of the best and most creative content creators in the world to find where the technology can evolve and improve the production experience,” comments Uzarowicz. “We just released a new video codec called Accelerated Volumetric Video (AVV) that makes it possible to add more volumetric characters to a digital environment. With the MRCS technology, the quality of a captured performance is better than ever. Volumetric video is constantly evolving,” he adds.

OptiTrack’s Motive 3.1 advanced motion capture software can be paired with any of OptiTrack’s motion capture cameras, including the premium PrimeX, Slim or low-cost Flex series. Motive 3.1 also offers trained markersets, enhanced sensor fusion and pre-defined settings. (Image courtesy of OptiTrack)
StretchSense makes motion capture gloves for major and indie studios, streamers, VR/AR and live shows. (Image courtesy of StretchSense)
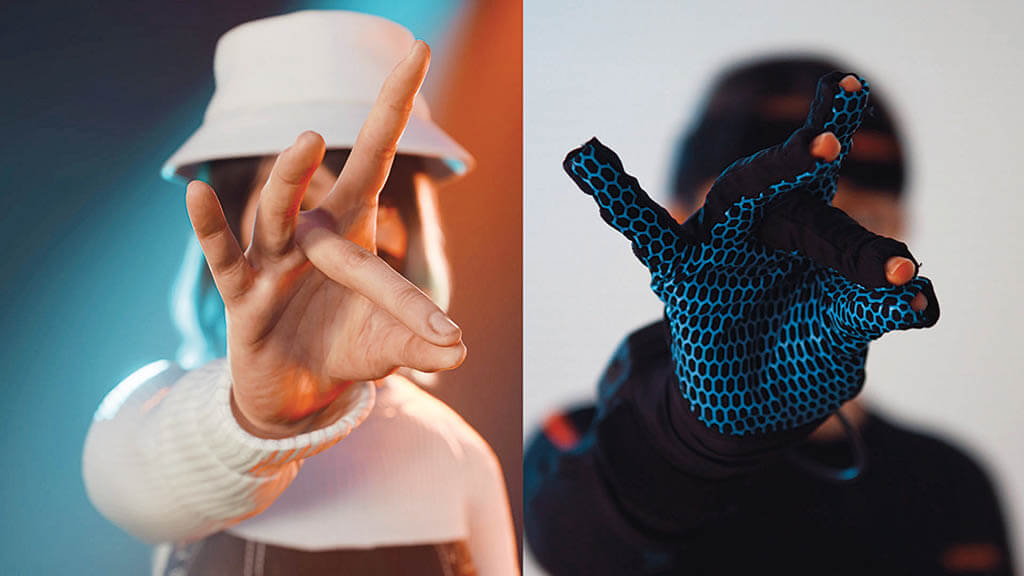
StretchSense’s mocap gloves are unobtrusive, with a less than 1mm-thick sensor layer on top of breathable athletic fabric and a small transmitting module. StretchSense’s $795 Studio Glove is a step toward the company’s goal of getting its gloves down to a true consumer price point. (Image courtesy of StretchSense)
“The trend towards real-time capabilities has become prominent, allowing for immediate feedback and integration into virtual environments, video games and live events. As we integrate artificial intelligence and machine learning as tools to enhance these functions’ capabilities further, it will enable automated analysis and capture of movements in real-time, which will help save time on the process, leading to cost savings.”
—Peter Rabel, Technical Product Manager, Digital Domain
Arcturus took over Microsoft’s Mixed Reality Capture Studios (MRCS) business in 2023, including development of the capture system, as well as rights to maintain and supply MRCS licenses to studios worldwide. Arcturus also now develops for all stages of volumetric video.
(Image courtesy of Arcturus)
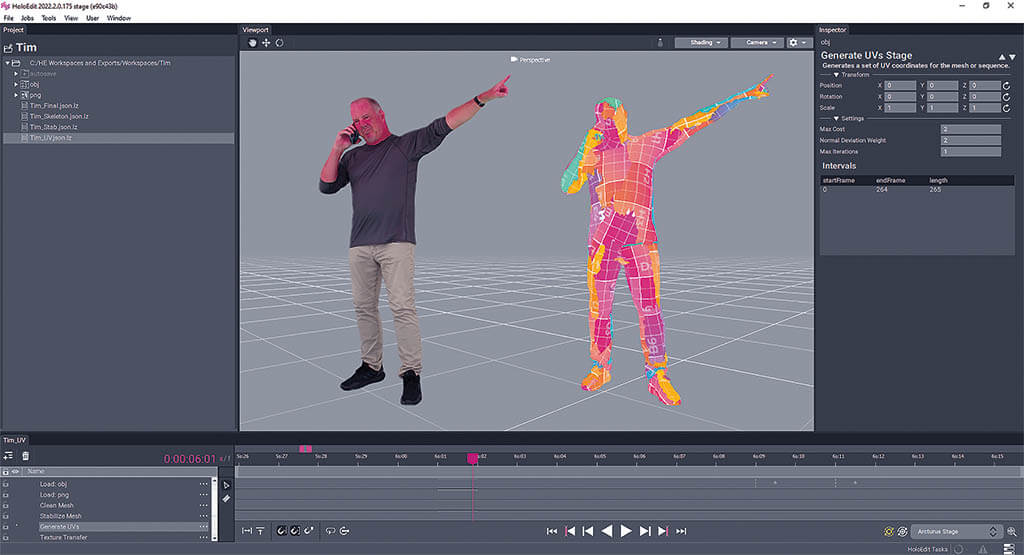
Arcturus’s HoloSuite tools consist of HoloEdit – a tool that can edit the 3D performances of performers recorded with volumetric video – and HoloStream, software that can compress a completed volumetric video file and stream it to any 2D or 3D device, even if the broadband signal is unstable. With HoloSuite it’s possible to use volumetric video for e-commerce, AR projects and virtual production. (Image courtesy of Arcturus)
MOVE AI
Move AI has announced the official release of a single-camera motion capture app, Move One, the company revealed in late November. “The app is now available to animators and creditors looking to bring realistic human motion to their 3D characters,” said the company. “Move AI makes it easy to capture and create 3D animations.”
AI/ML
“Arcturus is currently experimenting with AI and machine learning in several ways. From the moment we were founded, one of our main goals has always been to make volumetric video more accessible, and AI can help us do that in a few different ways,” Uzarowicz comments. “Among other things, one of the areas we are currently focusing on in our R&D is using AI to help us capture the same level of quality – or better – we can currently capture but use fewer cameras. One of the things that makes our MRCS technology the best in the world is the software that converts the multiple captured recordings into a single 3D file. With AI, we hope to improve that process.” Regarding AI/ML, O’Brien says, “We are seeing many companies using motion capture to create their own proprietary databases for training or tuning generative AI models, and we are looking at how we can lean into this. Finally, we are ourselves constantly investing in machine learning to improve the data quality [of ] our products.”
“Given our experience with machine learning, we see Gen AI as a tool like any other in our toolbox, enabling us to create artistically pleasing results efficiently in support of the story,” Digital Domains’s Rabel says. “We have found that the combination of powerful tools, such as machine learning and AI, with our artists’ creative talent produces the photorealistic, relatable, believable and lifelike performances we are striving for. We feel the nuances of an actor’s performance in combination with our AI and machine learning toolsets are critical to achieving photorealistic results that can captivate an audience and cross the uncanny valley.”
Lazzaro comments, “OptiTrack already uses ML algorithms to derive optimal solutions for things like continuous calibration and trained markersets. Continuous calibration takes existing visible objects in a scene, i.e. markers, and uses that data to determine how to make small adjustments to fix calibration issues related to bumps, heat or human error. Trained markersets allow you to feed marker data into an algorithm to make a model that can track objects that were previously not trackable, such as trampolines, jump ropes and other non-rigid objects. Lazzaro adds, “Advances in AI and ML will continue to shape the way that objects are tracked in the future.” Rokoko’s Balslev notes, “AI/ML will fundamentally change the motion capture space. Text-to-motion tools are emerging and maturing and will eventually completely disrupt the stock space for online marketplaces and libraries. These tools will however not be able to replace any custom mocap that requires acting and specific timing.”
Our mission is to democratize motion capture, allowing independent content creators and streamers to create incredible and immersive stories and experiences. To achieve this, we have a long-term goal of getting our gloves down to a true consumer price point, which will really open up the space. At $795, we think our latest StretchSense Studio Glove is the biggest step the industry has ever taken towards this goal; less than two years ago, something with similar performance would have cost
well over $5,000.”
—Benjamin O’Brien, Co-Founder and
VP Partnerships & New Markets, StretchSense


Move AI offers a single-camera motion capture app, Move One, for animators looking to bring realistic human motion to their 3D characters, making it easy to capture and create 3D animations. (Images courtesy of Move AI)
VR AND MOCAP
“We [Vicon and Dreamscape Immersive] are together mapping out just how far markerless mocap can go in providing a more true-to-life adventure than any other immersive VR experience by allowing for more free-flowing movement and exploration with even less user gear,” Vicon’s Finch comments. “Dreamscape has said it has long awaited the time when markerless could break from concept and into product, where the technology could support the precision required to realize its amazing potential. We’re testing that potential together now.” Finch adds, “Seeing people’s initial reactions to VR when they’re fully immersed is remarkable. The fantasy-reality line blurs, the more freedom you have in a VR space, which is reduced when a user is tethered and they feel the pull of the cable or know they’re wearing a backpack.” He continues, “There’s also the customer experience element that’s a central driver in all of this. People’s experience with markerless is a big wow moment. Markerless is going to lead to more magic – more wow.”
Lazzaro explains, “Mocap is used in all sorts of VR and AR applications. Typically, home systems use what is called inside-out tracking to have a head-mounted display [HMD] track the world around a user. This works great for HMD and controller tracking, but can’t be used to see other people wearing HMDs. OptiTrack uses an approach called outside-in tracking where we track the HMD, controllers and props using external cameras. This allows users to build location-based VR experiences in which multiple people can go through an experience together or engineers can work on designs in VR as a group.”
OUTLOOK
“We think these markets [motion capture, performance capture and volumetric video] will all be changed with the continued increase in accessibility,” comments StretchSense’s O’Brien. You can now do full-body mocap for less than the cost of a new iPhone, and basic volumetric capture can now be had for free on that same iPhone. This means different things for different markets: On a major AAA studio, you are going to see mocap happening on all of the people all of the time, and also on more ambitious projects that have more animated content than ever before. For independent creators, the financial costs of getting into mocap are dropping away so more people can join the space. Finally, there are millions of streamers worldwide who are getting new ways to connect with their community and make money while doing so by stepping into virtual worlds.”
“Mocap has a bright future in a variety of markets,” OptiTrack’s Lazzaro says. “This includes but is not limited to movies, video games, medical applications, robotics, measurement and VR. Mocap techniques are also becoming more commonplace with V-Tubers and other prosumer applications.”
By TREVOR HOGG
Images courtesy of Netflix.
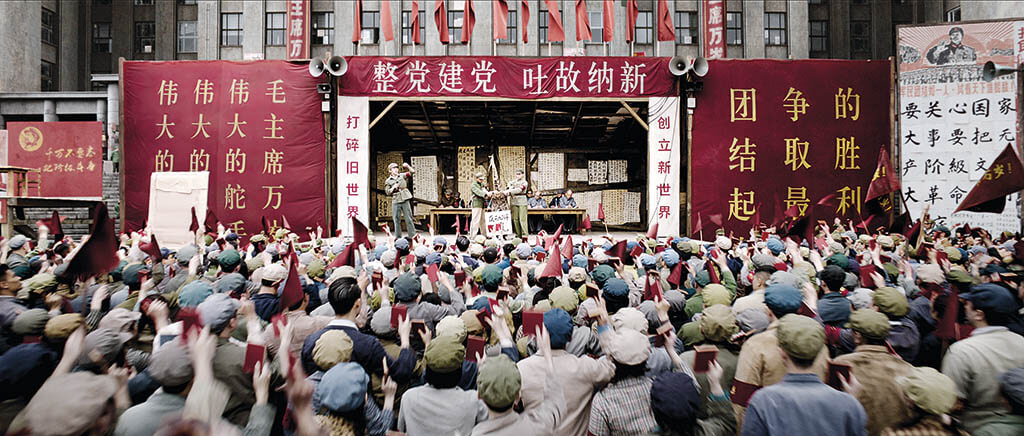
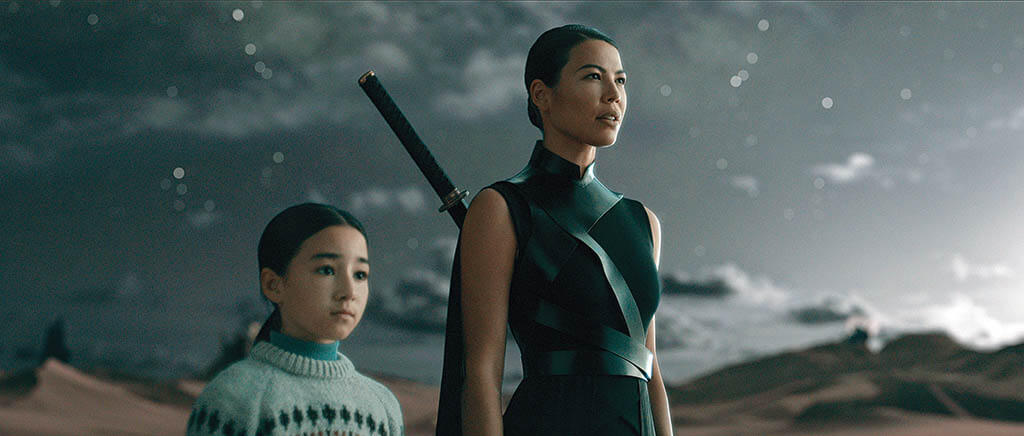
A major visual effects undertaking was constructing the environment and crowd at Tsinghua University watching the torture of intellectuals during the Chinese Cultural Revolution.
A computational conundrum occurs when the motion of three celestial bodies mutually influences each other’s gravitation pull. This serves as the premise for the science fiction series 3 Body Problem by novelist/series writer Liu Cixin, where an alien race living on an environmentally unstable planet caught between a trio of suns sets in motion a plan to invade Earth with the assistance of human conspirators. Adapting the novels for Netflix is Game of Thrones duo, David Benioff and D.B. Weiss, along with True Blood veteran Alexander Woo. The first season of 3 Body Problem encompasses eight episodes that feature major visual effects spanning environment builds, a multi-dimensional supercomputer compressed into a proton, a sliced and diced oil tanker, characters being rehydrated/dehydrated and a virtual reality game that literally feels real. The epic scope of the project required the creation of 2,000 shots by Scanline VFX, Pixomondo, BUF, Image Engine, Screen Scene and El Ranchito. An in-house team took care of additional cleanups, which ranged from a character blinking too much to having to paint out an unwanted background element.
Previs was an indispensable tool. “It’s a complete game-changer being able to do everything in Unreal Engine,” Visual Effects Supervisor Stefen Fangmeier states. “We did nearly no storyboarding. It was essentially camerawork. The funny thing was they were trying to get me to use a camera controller, and I said, ‘No. I’m a curve guy.’ I set a keyframe here and a keyframe there and interpolate. I even reanimated characters, which you can do in Unreal Engine in the most elegant way. You can take a couple of big performances and mix them together; it’s a fantastic tool. We worked with NVIZ in London who would prep all of these scenes, do the animation, then I would go shoot and light it; that was a great joy for me, being interactive. What was so interesting about 3 Body Problem was there is an incredible variety of work.”

Vedette Lim as Vera Ye in one of the many environments given the desired scope and vastness through digital set extensions.
A unique cinematic moment involves an oil tanker being sliced by nanowires as part of an elaborate trap to capture a hard drive belonging to a cult that supports the San-Ti invading Earth. “People get sliced every 50 cm, which we did mostly with digital doubles and a few practically built hallways and interior buildings. When you slice something that heavy vertically at 50 cm increments, the weight of what’s above it keeps it in place until the bow hits the shoreline. The dish on top of it collapses into the Panama Canal, which we created as a full CG environment,” Fangmeier states.
Opening the series is a massive crowd gathering at Tsinghua University during the Chinese Cultural Revolution to watch the torture of intellectuals, and because of the controversial nature of the subject matter shooting in Beijing was not an option. “Ultimately, we built the environment from photography and then took some liberties,” Visual Effects Producer Steve Kullback describes. “We wanted it to be realistic, but how big is the quad? What did the buildings actually look like? I don’t think anybody is tracking it quite that precisely, but what we ended up with is having 100,000 screaming students in front of us, and that was all shot quite virtually with a stage set that was built out and extended. It was an array of bluescreens on Manitous that were set up to move around and reposition behind 150 extras.” Crowd tiling was minimal. “We did one shot, which was a poor artist’s motion control. The director wanted a shot where the camera is pushing out towards the stage over the crowd, so what we did was start in the foreground pushing over it, repeat the move pushing over it and move everyone up. We put the pieces together, and it worked quite well. We didn’t have a motion control crane, just a 50-foot Technocrane and a good team that was able to repeat their moves nicely,” Kullback says.
Bai Mulin (Yang Hewen) sits alongside Young Ye Wenjie (Zine Tseng) who makes a fateful first contact with the San-Ti, which sets their invasion plans in motion.

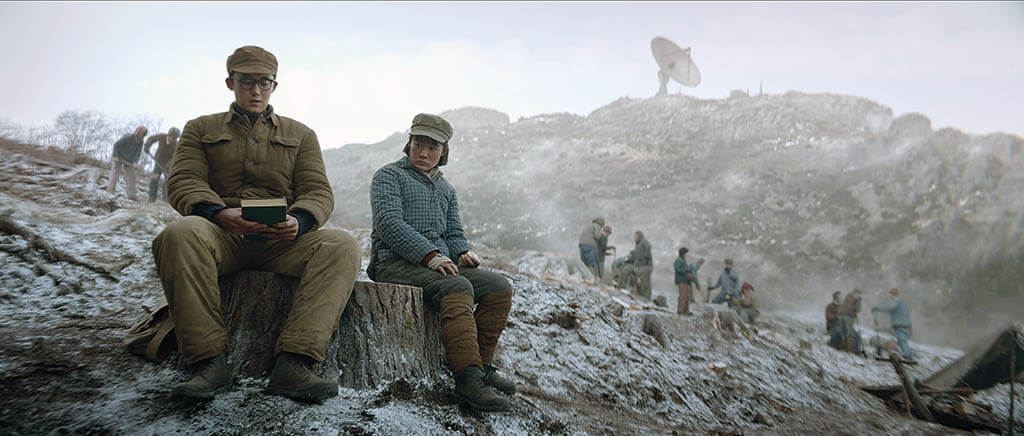
A radar dish test at Red Coast Base kills a flock of birds that were entirely CG.
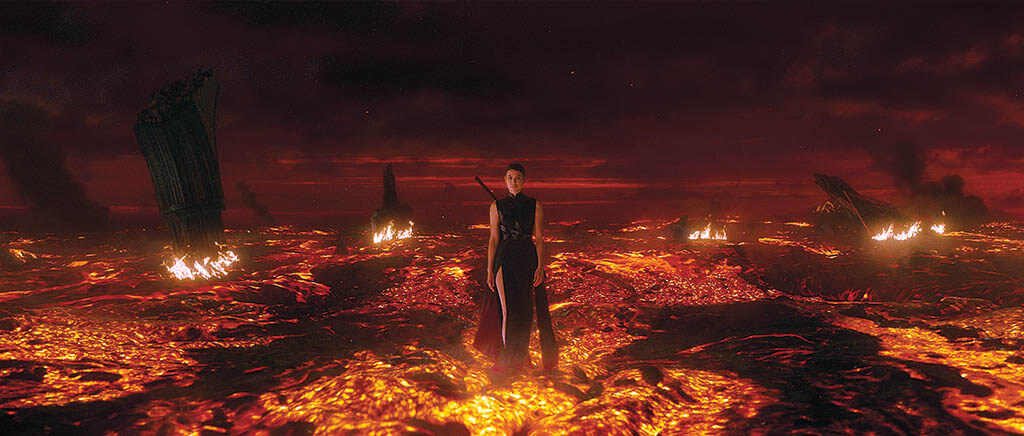
Sophon (Sea Shimooka) is an avatar in a VR game created by the San-Ti to illustrate the destructive environmental impact of living next to three suns.
The reflective quality of the VR headset meant that extensive photogrammetry had to be taken so each set piece could be reconstructed digitally.
One of the major environments simulated in the VR game is the observation deck of the Pleasure Dome constructed by Kublai Khan.
Another key environment build was the Red Coast Base where astrophysics prodigy Ye Wenjie makes first contact with the San-Ti in the 1960s, which sparks an invasion conspiracy. “For Red Coast Base, we had part of an observation base in Spain that was on a mountaintop, and it was a windy day with no rain, so we had some nice sunsets and great clouds,” Visual Effects Supervisor Rainer Gombos remarks. “Some of the buildings didn’t match what we wanted, and the main building was missing the large radar dish. We only had the base built for that. We had some concepts from the art department for how the extensions should work, and then we did additional concept work once we had the specific shots and knew how the sequence would play out.” The years leading up to the present day have not been kind to the Chinese national defense facility. “The roofs have collapsed, so we had to design that. It had to look like winter and cold when it was actually a hot spring day with lots of insects flying around, which had to be painted out. There is a sequence where the radar dish is being used for some test, and birds are flying from the forest and get confused by what is happening, fly close to the dish and die. There were a lot of full CG shots there and CG birds that had to be added. Also, one of the characters revisits the base to commit suicide, so we had to introduce a digital cliff that allowed her to walk up to the side of the dish and look over,” Gombos adds.
30 million Mongol soldiers appear in front of the Pleasure Dome before being lifted into the air because of the gravitational pull of the three suns.
Simulating what life is like on Trisolaris is a virtual reality experience developed by the San-Ti that demonstrates the global catastrophes caused by living in close proximity to three suns. “It was described as a simple arid desert landscape,” Fangmeier explains. “The more unique aspect of that was a certain lighting change. One sun, small and in the distance, was rising, and then suddenly that goes away and it’s night again. Having the light on the actors move that quickly was tricky to achieve on set. We decided along with Jonathan Freeman, the DP for Episodes 101 and 102, to shoot that in a LED stage with a bunch of sand on the ground where we could animate hot spots and the colors of the panels even though we were going to replace all of that in CG.” Being in the realm of VR meant that the destruction could be fantastical, such as 30 million Mongol soldiers being lifted in the air because gravity no longer exists, or witnessing the entire landscape engulfed by a sea of lava. Fangmeier explains, “Then, we have some pseudoscience, like going inside of a particle accelerator. The San-Ti have sent these two supercomputers the size of a proton to stop the progress of human technology, so when they arrive 400 years later [Trisolaris is over three light years from Earth], we won’t be able to easily destroy their fleet. The proton [referred to as a sophon] unfolds into this giant two-dimensional sphere that then gets etched with computer circuitry. We talked a lot about going from 10 dimensions down to two and then going back to a 10-dimensional object. It’s stuff where you go, ‘That’s what it said in the book and script. But how do you visualize that?’”
The VR game created by the San-Ti is so sophisticated that it stimulates the five senses of users such as Jin Cheng (Jess Hong).
The VR game setting allowed for a more hyper-real visual language and the ability to defy physics, like when Sophon (Sea Shimooka) talks with Jin Cheng (Jess Hong) and Jack Rooney (John Bradley) in Episode 103.
The Follower (Eve Ridley) and Sophon (Sea Shimooka) are San-Ti appearing in human form to make it easier for VR users from Earth to relate to them.
Eiza González portrays Auggie Salazar, a member of the Oxford Five, which attempts to foil the invasion plans of the San-Ti.
Cinematographer Jonathan Freeman made use of complex and specific lighting panels for the VR setting shots to emulate what it would be like surrounded by three suns.
To preserve their species until the chaotic era gives way to a stable one, the San-Ti have a specific methodology that involves dehydrating and rehydrating their bodies. “It happens in two places and provided us with unique challenges and creative opportunities,” Kullback observes. “The first time we see it is when the rolled-up dehydrated bodies are being tossed into the water by the army to bring our characters back to life. The rolled-up bodies that get rehydrated were a prop that was designed by the prosthetics artists and looked quite beautiful. We go underwater and see the roll land and begin to unfold. The camera is below it and the sun is above the water, so you have these beautiful caustics and an opportunity for all kinds of subsurface scattering and light effects that make the image magical and ethereal and support the birthing process that it’s meant to represent. At the end of the experience, you have a beautiful nude woman who comes to the surface. Then, you find there are other nude folks who have been rebirthed. We shot in a tank at Pinewood to have the underwater shots and the shots of the woman, who is the final realization of this rebirthing. For the elements of the roll landing in the water, we did shoot one for real, but ultimately that was CG. Then the environment above the surface was fully CG. But then you go to the virtual reality game where Jin Cheng is walking with the Emperor and the Follower, and a chaotic era suddenly comes upon us, and there is no room to hide behind a rock from the immense forces of the sun getting ready to melt everybody. The Follower lies down on the ground in a vast desert with the pyramid off in the distance and has to dehydrate. That one presented a bit more of a challenge because you didn’t have the opportunity to travel around her and have these beautiful caustics. We heavily researched the footage of things dehydrating, like fruit left in the sun rotting, to try to get a look that was like how the body would deflate when it was completely sapped of water.”
Being able to digitally reconstruct sets and locations was made even more important by having a highly reflective VR headset. “The reflective headset required some photogrammetry type work while you were shooting because it was often in smaller places, and there’s some crew, all of the lighting equipment, and everything is dressed in one direction,” Gombos remarks. “You had to capture that three-dimensionally because as production turned around, you needed it for the paint-out from the other direction. We had HDRI panorama photography of that, but then we also had good spatial information about the room and how that would connect to the shot lighting we would do. We wanted to be precise, and on top of that, we often did a special reconstruction shoot after we were done. I would come in for a few hours and do the photography and LiDAR required for locations. These assets were created on the fly, so we had them to review our work but also to send off to the vendors, and they were using them in post. The 3D assets were helpful in quality-controlling the work and a good tool for orienting our teams. I could have this little 3D representation of the set and share and discuss that with the DP or director. I would say, ‘If they are here, it’s going to look like this.’ It wasn’t theoretical but quite precise.”
“One thing that was a bit different for me was that I did a lot of the concept work,” Gombos observes. “I enjoyed doing that for set extensions that then Stefen and the visual effects vendor working with him would execute.” Fangmeier is intrigued by what the viewer reaction will be beyond hardcore sci-fi fans of the books. “It’s not your typical sci-fi where you spend a lot of time in outer space or meet aliens, and it’s not an alien invasion per se. It’s the first season, so it’s fairly mellow and highbrow. It’s deals with concepts other than the stuff that people are usually used to when they watch sci-fi. I’m curious what the mainstream viewer will think about that.”
There is a core mandate no matter the project for Kullback. “If we are able to help tell the story visually in areas where you can’t photograph something, then that’s our dimension. We’re never creating eye candy for the sake of eye candy. We work hard to have everything that we do fit into the greater whole and to do it in a seamless and attractive way. And, most importantly, in a way that communicates and moves the story forward and realizes the vision of the filmmakers.”
By Trevor Hogg
Images courtesy of Pixar Animation Studios.

Searit Huluf, Writer and Director of “Self.”
With the release of “Self,” a cautionary tale about the desire to please and be accepted by others, Searit Huluf got an opportunity to showcase her filmmaking talents as part of the Pixar SparkShort program. The project was partly inspired by her parents trying to adjust to life in America after immigrating from Ethiopia, which, at the time, was ravaged by civil war.
“My mom and dad separated, so it was just my mom looking after me. I had a lot more independence because she was working a lot. I mainly stayed in the east side of Los Angeles, which became my playground. It wasn’t until I got to UCLA that I started to explore more of Los Angeles, in particular the west side, which felt like being in a different country because everything is so clean, and there were a lot more shops.”
An opportunity presented itself to visit Ethiopia right before the coronavirus pandemic paralyzed international travel. “It was our first mother/daughter trip, and I had forgotten what it was like to be under my mom again,” Huluf recalls. “While in Ethiopia, my mother was cautious because the capital of Addis Ababa is not where my people are from, which is the Tigray region. It wasn’t until we got to Mekelew where my mom’s side of the family lives that we got to relax and meet people.” Huluf watched her aunts make coffee called ‘buna’ from scratch. “After roasting the coffee, they take it to everyone to smell to say thanks before grinding. Then you have to hand-grind the roasted coffee with a mortar and pestle. My friends and I made it every day. It was so much fun.”
Participating in sports was not an affordable option growing up, so Huluf consumed a heavy dose of anime consisting of Sailor Moon, Naruto, One Piece and Bleach. What was made available to her in high school was the ability to take community college classes on computer coding and engineering through STEM [Science Technology Engineering and Mathematics] programming. “I did a website competition inside of which there was a film competition, so I did a live-action short with all of the seniors in my group, and afterward I was like, ‘I want to go to art school.’” The art school in question was the UCLA School of Theater, Film and Television where she studied screenwriting and stop-motion animation. “I was trying to figure out what is the closest I could get to animation but not have to draw, and it was stop-motion; that was the happy medium because I do love live-action and animation. My schooling was live-action, but a lot of my internships were animation; that’s how I divided it up.”
Internships included Cartoon Network and DreamWorks Animation, then Pixar came to UCLA. “I kept in contact with the recruiter and started at Pixar as an intern in production management while making films on the side,” Huluf remarks. “I am also big in the employee resource groups within Pixar. I spearheaded the first celebration of Black History Month at Pixar and decided to make a documentary where Black Pixar employees talk about what it is like to be Black in America. The 19th Amendment documentary came about because I cared about people voting for the 2020 elections. It was a way to promote Pixar fans to go out and vote by having Pixar women talk about why they should do it and the complicated history of the 19th Amendment. Documentaries are scary because you go in with what’s there and make the story in the editing room. That was a lot of fun, and I gained more confidence to be a filmmaker, and I switched back to making narrative films.”

Soul was the first high-profile project at Pixar for Searit Huluf.
“I got to work with Tippett Studio, which I love! … There’s that Pixar comfort where everybody knows each other or someone adjacent. But these were complete strangers, and there was a big age gap between us. A little bit of me was going, ‘Are they not going to respect me?’ And it was the exact opposite. They were so loving and caring.”
—Searit Huluf, Writer and Director of “Self”
Critiquing, not writing, is where Huluf excels. “I went to a talk where a writer said that you have to wear different hats when you’re writing. When you’re wearing the writing hat, you’re writing all of your thoughts and ideas. Once you’re done writing, you put on the critique hat, and that’s where you start editing what you wrote. Is this actually good? Is it going to help your story? Is your structure right? You can’t wear both hats at the same time. I think a lot about that when I write. What is also great is that I went to UCLA and did screenwriting. I’m still in touch with all my screenwriting friends, and everyone is still writing. It’s nice to write something and the next week we do a writing session together and talk about the things that we’re writing.” Two individuals standout for their guidance, she says. “I still keep in touch with my UCLA professor, Kris Young, and am part of the Women in Animation mentorship program; [director] Mark Osborne is my mentor. It’s nice talking with him. He did Kung Fu Panda and The Little Prince. Mark is doing everything I want to do with my life! He’s doing live-action and animation. In this mentorship program, other women are working on their own projects. One Saturday we have it with him and the other Saturday is just us. That has been great.”
“Self” was inspired by Searit Huluf desiring to gain social acceptance as well as by the struggles her parents faced immigrating to America from Ethiopia.

“Self” marks the first time since WALL-E that live-action elements have been integrated with computer animation by Pixar.

Soul afforded Huluf the opportunity to work with one of her role models, writer/director Kemp Powers, who co-directed Soul.

Spearheading the first celebration of Black History Month at Pixar, Huluf went on to serve as a cultural consultant on Soul.

Searit Huluf helped to facilitate brainstorming sessions to make sure that there was cultural authenticity to the story, character designs and animation for Soul.
“[Director] Mark [Osbourne] is doing everything I want to do with my life! He’s doing live-action and animation. In this mentorship program, other women are working on their own projects. One Saturday we have it with him and the other Saturday is just us. That has been great.”
—Searit Huluf, Writer and Director of “Self”
Huluf has a support network at Pixar. “Luckily for me, I’m not the first Black shorts director at Pixar. Aphton Corbin made “Twenty Something,” so it‘s nice to be able to talk to her about it. Michael Yates did the Win or Lose streaming [series for Disney+], and I keep regular contact with Kemp Powers. It’s nice to talk to people who are in your arena. Personally, too, that’s why I do both live-action and animation, because there’s something about both mediums that gives me motivation and hope.”
Like Mark Osborne with The Little Prince, Huluf was able to combine computer animation and stop-motion to make “Self,” where the protagonist is a wooden puppet surrounded by environments and metallic characters created digitally. “I got to work with Tippett Studio, which I love! I studied stop-motion at UCLA, so I know what the process looks like, but I have never done it in a professional setting, and I’m not the animator; other people are doing this who have worked on James and the Giant Peach and The Nightmare Before Christmas. There’s that Pixar comfort where everybody knows each other or someone adjacent. But these were complete strangers, and there was a big age gap between us. A little bit of me was going, ‘Are they not going to respect me?’ And it was the exact opposite. They were so loving and caring. I still text with them.”
“I spearheaded the first celebration of Black History Month at Pixar and decided to make a documentary where Black Pixar employees talk about what it is like to be Black in America. The 19th Amendment documentary came about because I cared about people voting for the 2020 elections. It was a way to promote Pixar fans to go out and vote by having Pixar women talk about why they should do it and the complicated history of the 19th Amendment.”
—Searit Huluf, Writer and Director of “Self”

Going through various characters designs for the character of Self.
A significant lesson was learned when making “Self.” “I did a lot of my independent films by myself, and this time I had people who are paid and wanted to be involved,” Huluf notes. “Working with the animators was one of the most insightful moments for me. I would film myself and say, ‘How about we do this?’ They would be like, ‘We could do that, but how about this?’ And it was so much better. In the beginning, I was very precious about it and slowly realized, ‘They know what this film is and what needs to be told, too.’ It was a learning curve for me.” The transition to feature directing is more likely to first occur in live-action rather than animation. “That’s primarily because the stakes are higher in animation than a live-action film. This is purely based on budgets.”

A comparison of Self with one of the female Goldies.
A personal joy for Huluf was being able to design the costume for Self.
“When I think about filmmakers I look up to, I see that they start with smaller indie features. Barry Jenkins is a perfect example. Moonlight was only a couple of million dollars, and then he made a higher-ground film If Beale Street Could Talk. I want to start small and slowly build myself up. The big jump for me now is to do a feature. Luckily for me, I’m not too intimidated to do it. It’s more about when someone will give me the chance. I do believe in my ideas and storytelling capabilities. Right now, I’m writing and seeing how things go. I look forward to people watching ‘Self’ and being able to talk to them about it because that’s something new for me.”
Tippett Studio Senior Art Director and Lead Puppeteer Mark Dubeau explains the puppet design to Searit Huluf.

The hair of Self was the hardest aspect to get right. It was inspired by the hairstyle of Searit Huluf.

A dream come true for Huluf was being able to collaborate with Tippett Studio on “Self.”

Showcasing the detailed eyeballs for the stop-motion puppet crafted by Tippett Studio.
Pixar SparkShorts Build “Self” Esteem for Emerging Filmmakers
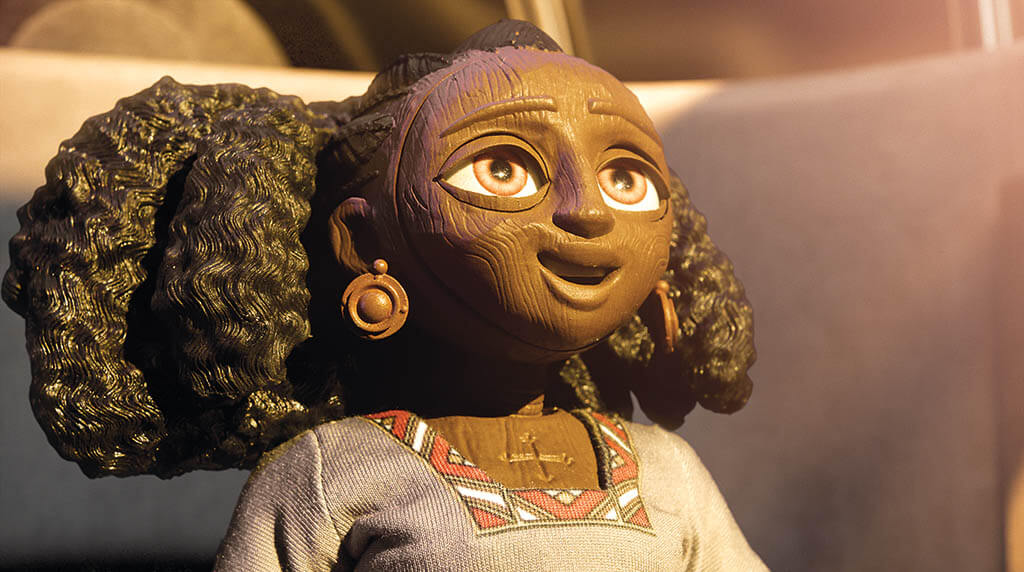
Treading a path blazed by WALL-E where live-action footage was incorporated into the storytelling, the Pixar SparkShort “Self,” conceived by Searit Huluf, revolves around a wooden stop-motion puppet desperate to be accepted into a society of metallic beings.
“For me, it was, ‘I really want to do stop-motion. I want to visually see something alive onscreen that you can see the handprint of a human touching it,” Huluf states. “I wanted the story to be the reason it had to be stop-motion.”
A central theme is the personal cost of gaining social acceptance. “I will play this game in my head of hiding parts of myself so I can conform and be part of the group,” Huluf explains. “That’s how I visualized Self as she literally rips herself apart to be like everyone else. The other aspect is my mom immigrated to America from Ethiopia, and I wanted to talk about how immigrants are usually not seen or heard. I wanted Self to feel like she is Ethiopian, so she has natural wood that has been carved by a masterful craftsman. There is something nice about her being so natural herself but wanting to be something so shiny, plastic and fake. There is something visually beautiful about that. Another layer on top is that she is even animated differently. Self is stop-motion, so she’s animated on 2s and 3s versus the CG Goldies, which are on 1s and are so slick when they move. Self is poppy and jumpy at points when she tries to talk and interact with them.”
Excitement and fear were felt when working out the logistics for the project. “I was excited about doing something so different and unique, but at the same time I had no idea of how you properly schedule out and manage a stop-motion film,” remarks Eric Rosales, Producer of “Self.” “I was like, ‘Alright, let’s learn this on the fly.’ You’re taking this whole new element and trying to fit pieces into our puzzle and take their puzzle pieces and put them all together.” The other puzzle pieces belonged to Tippett Studio which constructed, animated and shot the stop-motion puppet. Rosales says, “It was a breath of fresh air in the sense that you get to see how other studios approach their scheduling, decision-making and problem-solving. It was exciting for us to learn from them as much as they were learning from us, and learn how to take the different aspects of the stop-motion process and incorporate it into our pipeline. And vice versa, how we would handle something and transfer that information back over to Tippett. We did a lot of back and forth with them and shared a lot of thoughts.”
Complimenting and informing the design of the physical puppet was the digital version. “We had a digital puppet that Pixar was able to move around in the computer and act out what they wanted the puppet to do. That informed us in terms of how we needed to build the puppet to be able to effectively move in those ways,” states Mark Dubeau, Senior Art Director and Lead Puppeteer at Tippett Studio. “There is a lot you can do digitally that you can’t do with a puppet, and so we knew probably that we would have to build about three or four puppets to be able to do that number of shots.” Nine different faces were constructed to express panic, sadness, happiness and anger.
For a long time, the digital double of Self was a placeholder for 19 shots that utilized stop-motion animation. “But as things progressed, we turned off our character as she is now being added in the comp,” states Nathan Fariss, Visual Effects Supervisor of “Self.” “The amount of color tweaking and general polish that was happening in comp, and even the color grading steps in post, were much more than any of our other projects because we needed to match a photographic element to our CG world and vice versa.”

“Self” Producer Eric Rosales and Huluf examine the various pieces that go into making a stop-motion puppet.

Various body parts and variations had to be created by Tippett Studio to give the stop-motion puppet the correct range of physicality and emotion.
Previs and layout dictated the shot design for the stop-motion scenes. “We had a first lighting pass that was already done and even before Tippett started lighting everything up,” Rosales remarks. “We sent members of our lighting team over there to do the last bits of tweaking. Searit acted out every single shot that Tippett was going to do. She did it in her living room by herself. To sell the foot contact, Tippett ended up building a concrete slab out of Styrofoam so we were able to see Self physically walking on top of something.”
Self makes a wish upon a falling star that enables her to exchange wooden body parts with metallic ones. “I usually talk about what the character is feeling at the moment,” Huluf states. “The way we talked about that scene of her jumping off of the roof, I wanted to show how she goes from, ‘Oh, cool these body pieces are falling from the sky,’ to slowly becoming more obsessive in finding them. That face is the last piece for her. ‘I’m going to finally belong.’ A lot of people do a lot of crazy things to belong. In Self’s case she’ll rip herself apart to be like everyone. Self-jumping off of the roof is the climax of the film because it’s her craziness and obsessiveness all wrapped into one as she falls into darkness. We had a lot of conversations about how she snaps out of it, and for me, your face is who you are. As she steps on her own face, it snaps her back into reality and makes her realize and go, ‘Oh, my God! Why did I do this?’”
The cityscape did not have to be heavily detailed. “We ended up settling up a look that was a flat color or a gradient so it felt like there was a little bit of life in the city and things were lit up,” Fariss reveals. “There were other people present in the buildings, but it didn’t necessarily draw the audience into the lives that are going on in the buildings around there. The cities were mostly hand-built. There wasn’t enough scope to warrant going a procedural route to put the cities together, so they were hand-dressed, and there was a lot of shot-by-shot scooting some buildings around to get a more pleasing composition.”
More problematic was getting the hair right for the puppet. States Dubeau, “Once we figured out what urethane to use then we did all of the hair. However, we found out it was too heavy for the head. We had to go back and make two pieces of hair that go down and frame either side of her face. Those were made out of that material and painted. We hollow-cast the ones on the back, which had a wire that went into the head, and then you could move those pieces around, but you couldn’t bend them. The ones in front could swing and twist. It totally worked. Now you got the sense of this light, fluffy hair that was bouncing around on her head.”
“Self” was an educational experience. “One of the things that we learned from Lisa Cooke [Stop-Motion Producer] at Tippett is you end up saving your time in your shot production,” Rosales notes. “It’s all of the pre-production and building where you’re going to spend the bulk of your money. There was a lesson in patience for us because with CG we can take everything up to the last minute and say, ‘I want to make this or that change.’ But here we needed to zero in and know what we’ve got going on. Once the animators get their hands on the puppet and start doing the shots, the first couple of shots take a little bit of time. After that handful of shots, they get a feel for the character, movement and puppet, and it starts moving quickly. Then we were able to get our team on, and they were able to start learning their cadence as well. It started becoming a nice little machine that we were putting together.”
Searit appreciated the collaborative spirit that made the stop-motion short possible. “I’m approving things at Tippett and going back to Pixar to approve all of the CG shots multiple times a week. We had a lot of people who were big fans of ‘Self’ and helped us while they were on other shows or even on vacation or working on the weekend because they were so passionate. I’m grateful that Jim Morris [President of Pixar] let me have this opportunity to make a stop-motion film, which has never been done before at Pixar.”
—Trevor Hogg
By TREVOR HOGG
Images courtesy of FX.

Actor Hiroyuki Sanada had a key role in making sure that period-accurate Japanese was spoken by the characters.
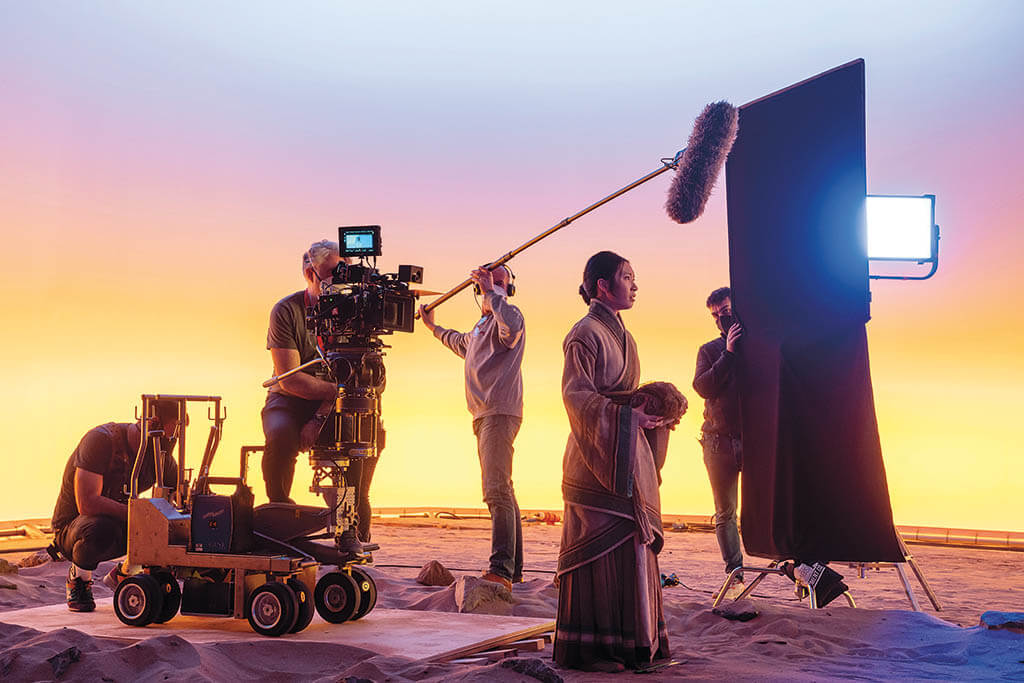
Inspired by the power struggle in feudal Japan that led to the rise of Tokugawa Ieyasu to Shōgun and his relationship with English sailor William Adams, who became a key advisor, James Clavell authored the seminal historical fiction novel Shōgun, adapted into a classic NBC miniseries starring Richard Chamberlain and Toshiro Mifune. Forty-four years later, the story has been revisited by FX and Hulu as a limited 10-episode production under the creative guidance of Justin Marks and Rachel Kondo.
“What we felt made Shōgun interesting today would be to tell more of an E.T. the Extra-Terrestrial story of an outsider who has shown up in the world that we let the audience inhabit,” states Justin Marks, Creator, Executive Producer and Showrunner. “We worked with our producers and star, Hiroyuki Sanada, as well as Eriko Miyagawa [Producer], to use their expertise to craft the dialogue in the right kind of Japanese.”
Regarding depicting the Sengoku Period, compromises had to be made. “There will always be a gap between accuracy and authenticity, which means negotiating which spaces are necessary to keep distance and which ones you need to close the gap,” states Creator and Executive Producer Rachel Kondo. “We were constantly defining and redefining what we’re trying to be authentic to. Are we trying to be authentic to a time or people or specific place?” Originally, the plan was to shoot in Japan, but the [COVID-19] pandemic caused British Columbia to become the stand-in for the island nation. “Very little cleanup was required relative to what it would be in Japan where you would be removing power lines all day just to get something to look natural, and then you want to plus it to the premise of the story,” Marks says. “With Michael Cliett [Visual Effects Supervisor and Visual Effects Producer], we worked out a system that would keep us flexible in post-production with what we would call a high and low appetite version of a shot; that element of protection was for storytelling reasons but largely for budget reasons. Then, what it allowed us to do was to say, ‘This is a show about landscapes,’ and on some level, we have broad landscapes and what we called ‘landscapes of detail,’ such as close-ups of tatami mats because they were shot with macro lenses.”

Anna Sawai felt completely in the role of Toda Mariko when the Christian cross was hung around her neck.
Osaka was the most straightforward of the three cities to develop because extensive reference material exists from 1600 and the general topography has not changed. “Ajiro was a gorgeous little cove on the waterfront, but the area itself wasn’t quite large enough to create a whole village. So, we had to make a mental jump to say that the upper village is where the samurai class live and the lower village was where the much poorer fishing folk live,” Production Designer Helen Jarvis explains. “We ended up using two different locations and then knit them together in a few establishing shots. Edo [modern-day Tokyo] was the city that Yoshii Toranaga [cinematic persona of Tokugawa] was actually in the process of developing and building at the time. We saved a portion of the waterfront Osaka set and didn’t fully develop it until much later in the series knowing that we had to create two city blocks that were in the process of being built. One of our set designers did a preliminary model of the shape of the city and how the castle might relate to the city; that ended up being much more in Michael Cliett’s hands. He had people scanning the buildings that we had and we had various other 3D files of buildings that we would like to see represented, like temples.”

Kashigi Yabushige attempting to rescue Vasco Rodrigues from drowning was a challenge to assemble for Editor Maria Gonzales.
Exterior garden shots of Osaka Palace were captured inside of Mammoth Studios, requiring soundstage ceilings to be turned into CG skies. “There was a lot of fake bounce light as if the set was lit by the sky rather than sunshine,” reveals Christopher Ross, Cinematographer, Episodes 101 and 102. “We would light the garden as if it was an exterior and then each of the sets would not only have direct light from whatever lighting rig, but they also had borrowed light from the gardens themselves. The way to create chaos in the imagery was to allow the sun to splash across the garden at times then let that borrowed light from the splash of sun push itself into the environment. Thanks to the art department, all of the ceilings were painted wood paneling, and we could raise and open each of them. Each ceiling had a soft box, so for the interiors there was a soft-colored bounce fill light that we could utilize should we need to.” A complicated cinematic moment was executed onboard the galleon, which gets hit by a huge wave. “You start on deck, end up below deck then return to the top deck, all within the space of a two-and-half-minute sequence. It required a lot of pre-planning and collaboration between the departments and in total unison with the performers on the day, getting the camera to track with one character, change allegiance and track with a different character, and track with yet another. It forced everybody to be very collaborative. It was great that we could pull that sequence off, and it looks epic.”


Originally, the plan was to shoot in Japan, but the COVID-19 pandemic caused principal photography to take place throughout British Columbia.
Contributing to the collaborative spirit was Special Effects Supervisor Cameron Waldbauer. “You take the boat sequence, for example. We’re dumping water on a ship that is on a gimbal, and Lauro David Chartrand-DelValle [Stunt Coordinator] has guys going off the side of the boat, and we’re rehearsing that and putting that together. Then, Michael Cliett takes that, puts it out into an open ocean, and it looks seamless in the end,” Waldbauer says. Storyboards were provided early on. “We would do tests of things and make things that we wanted to do. We would almost go backward so they would get the information from those tests and put that into the storyboards that were presented to everybody else,” Waldbauer adds. Shōgun offered an opportunity to return to old-school special effects. “I’ve done several superhero movies with lots of greenscreen and stage work, and that wasn’t what this was. This was interesting for me and the crew to work outside for the next seven months. Now you’re dealing with all of the weather and elements, and you’re working on a show that doesn’t have the time to come back to do it later. You deal with what’s happening on the day. We did get the weather that we wanted for the most part. The desire to get everything in-camera meant incorporating effects rigs into sets and hiding them on location. We have tried to match what would actually happen on the day and what would happen at the time. A sword hits a person in 2024 the same way as it did in 1600. However, you need to make sure to get the look that the director wants out of it dramatically, instead of having to adhere to what it used to look like,” Waldbauer explains.

Hiroyuki Sanada portrays Yoshii Toranaga, who author James Cavell based on Tokugawa Ieyasu, founder of the last shogunate in Japan.
Serving as a translator between Yoshii Toranaga and John Blackthorne is Toda Mariko (based on Akechi Tama), portrayed by Anna Sawai. “For Shōgun, there wasn’t that much acting with visual effects,” Sawai notes. “It was more, we have an amazing set, and on top of that when they go in on a wider shot, they’ll be able to see through visual effects what Japan looks like. There is an ambush scene, which was supposed to be arrows flying and, obviously, they weren’t going to do that, so we had to pretend they were coming at us. For the ship scenes, I would have to look out into blackness because we were shooting that at night and visualize it being a beautiful ocean. It’s difficult when they zoom into my face, and you’re thinking about, ‘I’m visualizing this, but I’m actually seeing a camera thrown right in my face!’ Those things are hard, but it’s part of our job that we use our imagination.” Two years were spent training at Takase Dojo prior to production. “Then on Shōgun,” Sawai continues, “I found out that I had to do the naginata fighting, which is a completely different thing because now you’re working with something that is super long and hard to control because it’s heavy, which it should be because if it’s light it’s not going to show that you’re actually fighting.” Performing stunts is not a problem for Sawai. “I love it! I love it so much! I feel lucky that when Lash [Lauro David Chartrand-DelValle] saw me fighting, he was like, ‘Let’s try to use as much of you as we can, and other times we will go with Darlene Pineda [who did an amazing job as my stunt double].’”


The opening of the series was altered to have the Erasmus appear like a ghost ship during a vicious storm.


Osaka was the most straightforward city to construct because extensive reference material exists from 1600.
“We didn’t have a lot of previs for this show, which is unusual considering the scope of it,” observes Maria Gonzales, Editor, Episodes 101, 104, 107, 110. “We did have some storyboards and used those when we could. I stayed in touch with Michael Cliett as much as possible because he was my go-to in terms of understanding the potential for some of these shots. You try to put the thing together in the way that makes the most sense, and some of it we had to pick up later on once we met with the directors and talked with Michael. Sometimes, he was able to send me artwork that helped guide us in a certain direction.” Temp visual effects were created within the Avid Media Composer by the editorial team. Gonzales adds, “I did the pilot episode where there was a huge storm and some of those big reveals of Osaka. Our guys decided to pull in as many shots as they could to give an idea what the real scope of the scene was going to be.” The cliffside rescue of a drowning Vasco Rodrigues was a mindbender to assemble. Gonzales explains. “I had some of the close-ups and wider shots. I had no idea of what this was going to look like and what the height of the cliff really was. My first assembly was very different from what you saw in the final. Once Michael and Justin came to the cutting room, we were able to finesse it and get it to what you see today. But it was with Michael’s help that I was able to finally see what this was supposed to be. It’s like, ‘No. No. No. These guys are supposed to be way up and Kashigi Yabushige is supposed to be falling way down.’”
Three different locations were involved in creating the scene mentioned above. “We were on a six-foot-high set piece in a field of grass in Coquitlam, B.C.,” reveals Michael Cliett, Visual Effects Supervisor and Visual Effects Producer. “Everything on the top of the cliff was shot on that set piece. Every time you looked over the top, that was all CG water, coastline and Rodrigues. We did another set piece that was on the side of the cliff when Yabushige was repelling down. We shot all of the profile shots and him hanging from the top down on a vertical cliff piece in our backlot over where we had the Osaka set ready as well. Then we had the gulch where the water was out on a 60-foot tank special effects setup with the rocks. We were praying for the right weather and light at all three locations because each of them was outside.” Another dramatic water moment is when the Portuguese carrack known as the Black Ship attempts to prevent Toranaga from leaving the harbor of Osaka. “The galley was stationary, but we did put the Black Ship on 150 feet of track. We got the Black Ship from Peter Pan & Wendy that had just finished shooting here, chopped it up and made our own design. It’s roughly one-eighth of the ship. We did have some motion where it appeared that the ships were jostling for position. We shot a bunch of footage, but at the end of the day we weren’t quite sure how we were going to fill in the gaps, what the ships would be doing, what shots we needed of the ships that were going to be all visual effects and how that story was going to come together. ILP and I cut things together differently and tried to fill in those gaps. Over two months in the summer of 2022, we finally had it working with a bunch of greyshade postvis.”


Three different locations were assembled together for when Kashigi Yabushige descends a cliff to rescue a shipwrecked Vasco Rodrigues.
Over the 10 episodes, 2,900 shots were created by SSVFX, Important Looking Pirates, Goodbye Kansas Studios, Refuge VFX, Barnstorm VFX, Pixelloid Studios and Render Imagination, while Melody Mead joined the project as a Visual Effects Associate Producer, allowing Cliett to focus more on supervision side of the visual effects work. “At the beginning of Episode 105, Toranaga is arriving with his 100,000-person army, which was 99% digital, as we rise up and move past him,” Cliett remarks. “The Japanese have a way of moving and walking, so we did do a number of motion capture shoots with Japanese soldiers and instilled a lot of that into the digital versions of them.” Toranaga’s army establishes a base camp on an encampment that subsequently gets destroyed by a massive earthquake. “This is why we had to put mountains surrounding the training fields, because there are huge landslides that come down which bury the army, and we had to make it on the magnitude where we could sell that 75,000 people died,” Cliett notes. FX Networks Chairman John Landgraf raised a narrative question when trying to lock the pilot episode about how the Erasmus, the Dutch ship piloted by Blackthorne, gets to Ajiro. Cliett explains, “I said to Justin, ‘Why don’t we look into having the ship being towed in? The samurai are running about 50 skiffs, but the villagers are doing all of the work. Then, we can fly past the ship into Ajiro, which you get to see for the first time.’ Justin loved it. Then, John Landgraf loved it. I ended up taking a second unit out, directing that plate and doing that whole shot. It’s one of my favorite shots of the series.”
By TREVOR HOGG

The prevailing question for Aaron Eaton in regard to holograms is how to make something that does not exist look like something that could be captured by a camera, such as this one featured in Avengers: Endgame. (Image courtesy of Cantina Creative and Marvel Studios)
When the final credits roll, it becomes quite clear that you literally need an army of talented individuals spanning a wide variety of professions to make a film or television production a reality. To take a more micro perspective, one can look at the visual effects section where hundreds upon hundreds of names are listed for each of the vendors, and then it truly sinks in – the number of unsung heroes who have contributed their time and talents far from the public spotlight. This lack of awareness also happens within the visual effects industry as generalists have given way to specialists who are more insulated from the contributions of their colleagues in other departments. In an effort to rectify the situation, a number of visual effects companies were asked to put forward candidates deserving of recognition for their exemplary professionalism and skillset. Think of those listed below as just a small sampling of people and occupations that are pivotal in making the visual spectacle and invisible transformation possible.
Aaron Eaton, VFX Supervisor, Cantina Creative
I like that I’m not specialized because I would hate to be doing one single thing all day long! I’m happy to have found Cantina Creative where I can still be a generalist even today. You don’t just work on a shot for an hour, send it off to somebody and never see it again. I’m able to work on something, and it can be very much my own, and you’re involved with it through all of the stages; that has been cool. Compositing is definitely my favorite. It’s that final creative push of bringing something extra to a shot that makes it sit in there and look awesome.
Holograms are a lot trickier than it seems because you’re working on something that doesn’t exist. How do you make the hologram absolutely believable as if it’s something you could film with a camera? There are numerous things that it takes to make the hologram feel integrated into the shot. It has a lot to do with mimicking everything that the camera is doing, with lots of depth in the element, textural elements, noise, grain and glitches. All kinds of subtle features that could come with all of these holograms because a hologram may not be perfection. You have to think about the technology that is projecting or creating the hologram and all of the aspects of how it would actually work.

Understanding composition and cinematography was important to Cameron Widen when doing the layout of the exterior train shots for Season 3 of Snowpiercer.
(Image courtesy of Image Engine Design and TNT)
“As workflows and techniques are ever-evolving, for me, it is more important to be on top of the questions that often do not change. How do I stay efficient so that I can be creative? How do I continue to be inspired and to inspire? How do I stay proud of my work?”
—Jason Martin, Layout Artist, ILP
Alan Puah, Head of Systems, Territory Studio
Systems is responsible for some of the most critical parts of the pipeline, things like the storage, network and render farm, which form the backbone of the infrastructure in a visual effects studio. Sometimes the existing infrastructure will dictate how the pipeline works, but often it works the other way around, and we’ll need to upgrade and adapt things to support how a project pipeline is structured.
Creating CGI places some of the highest demands on the technology used, so it’s important to make sure that you’re keeping up with new technology. There is probably more happening now than at any other time as advancements in machine learning and how the exponential growth in computing power impacts our industry. But there’s also been some reversal in trends. For example, in some cases utilizing the cloud hasn’t been the best fit, so there’s been a migration back to on-premise for various reasons that include saving costs or maintaining more control over data and security.
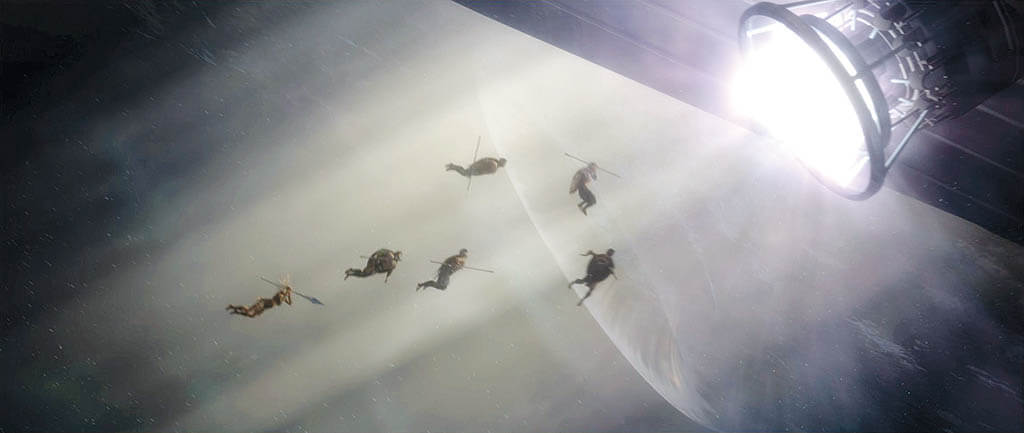
Cameron Ward produced previs for the Black Panther: Wakanda Forever sequence of Namora leading a squad of Taloncail to take out the sonic emitter on the Royal Sea Leopard. (Image courtesy of Digital Domain and Marvel Studios)
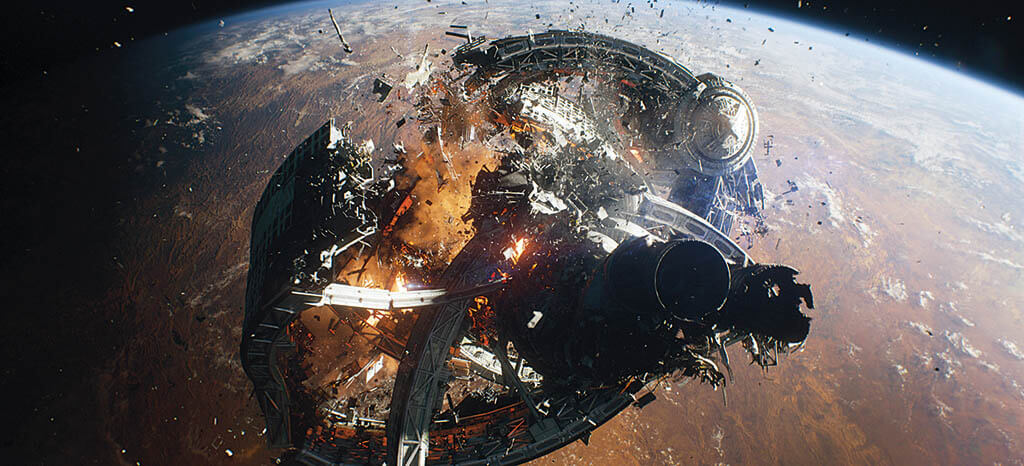
Technical animation had to be created by Jason Martin for Lost in Space Season 2 to support the effects needed for destruction shots. (Image courtesy of ILP and Netflix)

Jeremie Lodomez believes that compositing is vital to seamlessly blend CG, animation and live-action footage, which was the case for the Heroes of the Horn reveal in Season 2 of The Wheel of Time. (Image courtesy of Framestore and Prime Video)

It was the book The Art of The Lord of the Rings that made Jeremy Melton want to be involved with world-building for shows such as The Orville: New Horizons. (Image courtesy of FuseFX and Hulu)

For Maike Fiene, it’s important not to be too precious about visualization, as the needs of a production like Jingle Jangle: A Christmas Journey will evolve over time. (Image courtesy of Framestore and Netflix)
Alicia Carvalho, Senior Rigger, DNEG
I broadly describe my job to people who aren’t in VFX as “putting in the control structures so that animators can animate. “Coming mostly from feature animation, TV and game cinematics, working in a visual effects pipeline has been a really interesting experience, especially when you’re working on rigs where the end result has to match a plate. You have another layer of restrictions of what can move and in what way compared to the relatively free rein you have in Feature when the bounds of what you can do are based on the needs/imagination of an animator.
With machine learning and the move towards game engine integration, it’s going to be more important for artists to hold onto their foundational skills. In general, I’ve noticed a promising trend among companies discussing and wanting to move more female colleagues into supervisory or lead roles, but there doesn’t seem to be enough mentorship support once those positions are filled. There’s definitely always room to improve.
Cameron Ward, Previsualization Artist, Digital Domain
I was on Black Panther: Wakanda Forever, and there were some beautiful renders of the boat as the hydro bombs kept coming and explode beneath it. We had a little time so we could dial it in and make it look great before delivering it to the client, but that’s not always the case. It depends on the project and what the client requires because sometimes they’re only looking for rough. However, sometimes lighting and composition can sell a shot.
Years ago, I was on The Fate of the Furious, and we went to get scans of the city. We were laying out the streets and the heights of the buildings. We got a Dodge Challenger and mounted a camera on its hood. When the day came for shooting, they weren’t paying craft services for four days’ worth of shoots, but for one because they got it all in a day. There’s that aspect as well. You’re cutting down the cost of an actual day of production because you already know your camera angle, focal length, how high you want the camera off the ground and how fast it will be going.
Cameron Widen, Layout, Image Engine
The word ‘layout’ means a different thing for every studio – and often with every person you speak with in a studio. Layout in feature animation is wrapped up a whole lot more in previs-type tasks, like figuring out camera angles and composition. In visual effects, most of the time we’re working with plates that have been shot, so there are not a lot of choices to be made by us in that regard. That said, in almost every project there will be some full CG shots that don’t have associated photography with them, and that’s where we get to flex our creative muscles and use our composition and cinematography skills. Recently, we’ve been getting a push to give our layout versions and presentation that we send for review a much nicer look than what I’m typically used to doing. My preference is to send grayshaded renders for review because then people will be commenting on composition, speed of the camera and camera framing. If our layout versions look too nice and polished then we will start getting visual effects supervisors or other people who will see an issue with a texture map or some shading that we have no control over, and they will fixate on that and won’t make any comment on the layout part.

Meliza Fermin created a futuristic Brooklyn Bridge for The Orville. (Image courtesy of FuseFX and Hulu)

As a workflow supervisor, Michael Billette spends time informing the various departments at Image Engine how to best utilize the pipeline when working on projects like Bloodshot. (Image courtesy of Image Engine Design and Columbia Pictures/Sony)
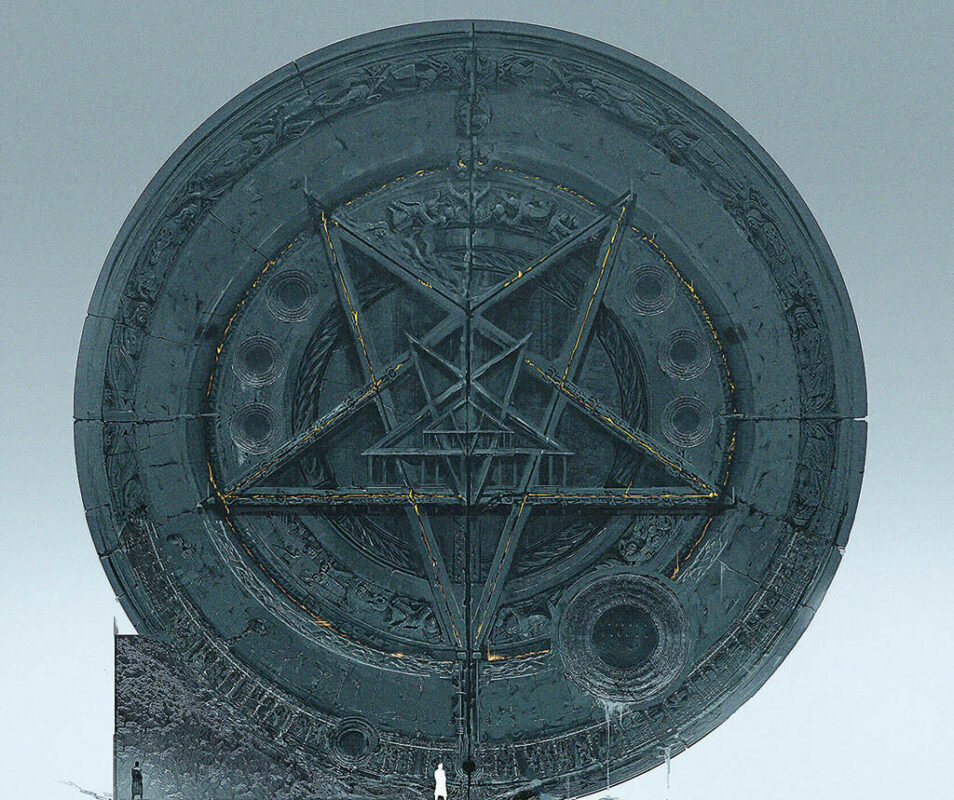
Concept art of Lucifer’s Palace door by Niklas Wallén for the Season 1 of The Sandman. (Image courtesy of ILP and Netflix)

During pre-production and through post on The Marvels, Patrick Haskew provided visualization that was used to help convey a whole crew being swallowed up by Flerkens. (Image courtesy of The Third Floor and Marvel Studios)

A large part of the job for Sam Keehan is providing the necessary support so that artists can concentrate on their job and produce the best results for clients like Marvel Studios on Ant-Man and the Wasp: Quantumania. (Image courtesy of Territory Studio and Marvel Studios)

Turntables are indispensable when submitting textures for review to make sure that the final image has the right reflectivity and surface deformation, such as when working on Shang-Chi and the Legend of the Ten Rings. (Image courtesy of Digital Domain and Marvel Studios)
George Sears, Head of Virtual Production, The Imaginarium Studios
Essentially, my job is to look after all of the real-time technologies on our stage, and that’s everything from basic characters to in-camera effects to LED walls. We also tend to get involved with pre-production looking at assets, the things that we will be driving live and what the director wants to achieve. Then we put together a bunch of real-time technologies that we have at our disposal for that project. I essentially see the job as a tie-in with the animation, mocap and visual effects for films, video games, television, AR and the web. We use Unreal Engine 5 to stream all of our live motion-capture data onto, and that’s where we’ll do the live characters and virtual cameras to support the director. The main reason we do this is that the client can go away on the day, have signed off shots, know exactly what they’re doing and bringing into post-production and, depending on the workflow, sometimes walk away with a real-time edit. They can go into post-production confident that they’ve got everything, and generally it saves a bunch of money and time in the decision-making process. Also, I oversee our pipeline and head a R&D team.
Jason Martin, Layout Artist, ILP
As workflows and techniques are ever-evolving, for me, it is more important to be on top of the questions that often do not change. How do I stay efficient so that I can be creative? How do I continue to be inspired and to inspire? How do I stay proud of my work? [One of the most complex tasks] would be something we call “Technical Animation” that I did on Lost in Space S1 and S2 to support effects on the destruction task where large environments or spacecrafts collapse or get destroyed. I would supply a semi-detailed version of the event to effect, made with various methods in Maya, like keyframe animation, rigid simulation, cloth simulation or deformation, that talented effects artists would enhance, develop or add to. This workflow enabled us to maintain a high level of artistic control on small-sized teams often consisting of me plus one to two persons, but the sheer amount made it complex.
Jeremie Lodomez, Global Head of 2D – Film & Episodic, Framestore
Compositing plays a vital role in the visual effects pipeline, seamlessly blending elements such as CG, animations and live-action footage in the final output. It enhances realism and supports storytelling by ensuring all elements are consistent in lighting, perspective, and color. My aspiration is for compositors to perform rapid iterations within their software. For instance, tweaking a CG environment without getting entangled in lengthy interdepartmental revisions. This approach would enable swift creative iterations, with the potential to integrate these fixes into later stages of the pipeline. The rise of technologies like USD and Unreal Engine heralds a future where compositors could emerge as more dynamic players in the field, evolving into Image Composition Artists. The fact that audiences are unable to discern our visual effects work speaks volumes about the quality and realism we achieve.
Jeremy Melton, Art Department Supervisor/DMP/ Concept Artist, FuseFX
I saw The Art of The Lord of the Rings when it came out, and my mind was blown. I said, ‘That’s what I want to do.’ As an art director supervisor, I try to encourage everyone to be an artist, be the best that they can, and encourage them to go in the direction that they want to go. Not pigeonhole someone or make them do something that they don’t want to do. But at the same time there is the corporate side of making sure that the budgets and all of the rules are being followed, that we’re doing everything that we’re supposed to do. It’s wild. I was never trained in it. I worked into the position by experience. You have to be open, especially with the advent of AI using Blender or ZBrush, whatever helps the artist to get to where they need to be to create the best possible image. That’s one thing I want to encourage. Instead of, ‘This is how it’s done,’ let’s open it up.

Thomas Mouraille believes that the term ‘Environment/Generalist’ is better than ‘Matte Painter’ as it more accurately describes the work done for shots of the gulag
in Black Widow. (Image courtesy of Wētā FX and Marvel Studios)

Thomas Mouraille makes use of 3D software, such as Maya, ZBrush and Substance combined with 2D elements created in Photoshop, to produce matte paintings for The Eternals. (Image courtesy of Wētā FX and Marvel Studios)

When creating technology for the big screen, one has to keep in mind how it would actually work, which was the case for Aaron Eaton when working on Black Adam.
(Image courtesy of Cantina Creative and Warner Bros. Pictures)

When working with plate photography. Cameron Widen has a lot less creative freedom for layout than when dealing with full CG shots, as reflected in The Book of Boba Fett. (Image courtesy of Image Engine Design and Lucasfilm Ltd.)

There are constant questions that Jason Martin is always trying to answer, such as how to stay efficient in order to be creative when working on an image of Sundari in Season 3 of The Mandalorian.
(Image courtesy of ILP and Lucasfilm Ltd.)

Being an art department supervisor means that Jeremey Melton also has to be conscious of budgetary restrictions when working on The Orville: New Horizons.
(Image courtesy of FuseFX and Hulu)
Katie Corr, Lead Facial Animator and Facial Capture Technical Director, The Imaginarium Studios
It’s quite fun working with a lot of different clients because you’ve got some realistic projects that use metahumans, and that’s one of our pipelines. Then you have stylized projects that are cartoony, and I get to have a bit more freedom with that. My job begins from onstage with capture, and that means taking care of the actors, making sure that the client is happy, and capturing the date so that the post team can make sure that they get a good result on their tracking. Then, we move on and start tracking through one of our pipelines. From there we take it onto their provided rig and do final cleanup to their specs that they have been asked for depending on the game, movie, TV show or ad. Anything you can think of, we’ve attempted! The more time you spend on it, the higher quality it becomes. It’s quite a subjective area. You try to nail down little nuances like nose flares or when someone is breathing or little eye twitches. The fun part of the job is you get to hear the request from the client, then challenge yourself, find ways around it and maintain their expectations.
Maike Fiene, Visualization Supervisor, Framestore
Visualization being the first step to showing the interaction with the CG elements, it is essential to accept that there will be changes to the work as it develops, and you need to be able to adapt and cannot be too precious about it. It is also rewarding as you get to shape the interaction of fun and sweet character moments. This is a very fast-paced environment and requires a general skillset of: understanding of practical filming techniques; being able to interpret storyboards and scripts; general overview and intention of the sequence you are working on (tone, timing, what purpose does this sequence have in the film? What is the director trying to communicate?); general understanding of cinematography (staging, lighting, composition); and all-round technical troubleshooting skills.
In postvis, we’re often collaborating with the finals teams as they might have developed assets further or are developing character animations, and we try to incorporate as much of that as possible to stay true to the final look of the project. This gives the director a chance to shape his vision of the edits at an early stage and test out ideas, and it gives the finals teams a solid foundation to start from.
Meliza Fermin, Lead Digital Matte Painter and Sr. Compositor
As a matte painter, you’re in the beginning of the process, and I prefer that because you have more time, it’s a lot more creative, and you’re choosing more of the elements that are going to be used. Our clients say, ‘I want New York in the 1960s.’ You have to create that, but I’m the one who chooses all of the photographic elements to put together so it works in that environment. You have some creative input. Some studios have me do the matte painting and comp it, or I have worked where I was strictly a matte painter and hand it off to the compositor. The nice thing about having both is I know the problems compositors are going to run into; I have already prepped the matte painting so it does work, and they don’t have to come back to me. Compositing is more technical than creative. Sometimes there’s no time to go back to CG or matte painting, so you have to find fast ways to fix it. You’re a problem-solver.
Michael Billette, Workflow Supervisor, Image Engine Design, Inc.
We’re constantly talking to every department about the challenges of their day-to-day job, and we think about how things can be improved and how can they utilize the parts of the pipeline we have already developed they might not be aware of or understand how it could be applied. We do a lot of trying to teach people how to use the tools. Then we also think about how can we improve upon our processes and keep things in sync. We can only do so much as a support department, and it’s not necessarily fast enough for what people need on the floor. Often times, if artists are developing their own workflows or tools, things get very fragmented very fast. Each person tries to do their own solution and can go down different roads. We try to keep things in line because it’s a lot easier for the technical teams to develop when they don’t have all of these parallel processes to work on. They can create some core features and make sure they can support the other workflows that are needed.
Niklas Wallén, Concept Artist, ILP
You need to have your fundamentals as a concept artist and some design rules that you can always apply that will make it look better. But sometimes I get given things and go, ‘I don’t see the problem here.’ When I began at ILP, my mentor, Martin Bergquist, told me, ‘Your job is to check out the art direction and documents from the client and what they had in mind from the start, be good with that and create a design rule book. But then you take those design rules and have fun with them.’ If you have these design rules in yourself always, it’s easy to spot when something is wrong with an image. Whether it’s The Mandalorian or The Sandman that have totally different shape languages, I can tell quickly if this is out of line because there’s usually someone who has built the stuff, has been with it for a long while, and maybe they have put themselves into a rabbit hole and forgotten what the shape language is. It’s my job to go in and say, ‘That will work better if I did this.’
Patrick Haskew, Sr. Visualization Supervisor, The Third Floor
Visualization helps build the foundation of what you see on the silver screen. Because you can iterate quickly and work closely with many collaborators – including the VFX Supervisor – from day one on the production, the process is invaluable in helping develop the look of the visuals as it relates to telling a believable [shootable] story. We are also able to provide and use technical visualization and virtual production tools that help connect what’s visualized to shots and equipment on set, and ensure that work and plans from pre-production carry through and can be built upon through post.
The industry is always trying to figure out how to make film and television cheaper and faster, and we are at the forefront of that endeavor. But, at the end of the day, the relationships built with the directors, producers and VFX supervisors are at the heart of the process. Technology will always change, but it all starts from an idea to tell a story audiences will love. We are in that room and help represent that storytelling vision.
Patrick Smith, Head of Visualization, MPC
Visualization has grown out of its infancy and is starting to get into its teenage punk-rock years. With the advent of all the tools and real-time technology that is coming to the forefront with virtual production, visualization is certainly a key component of that evolving filmmaking pipeline, and it shines a spotlight on everything that we’re doing. It’s taken off like wildfire. Everybody and their brother have a visualization studio now, and every visual effects house is folding a visualization department into the front-end of their pipeline. The easiest way of understanding visualization is likening it to sculpture. Imagine starting with a giant slab of marble and saying, ‘We’re going to sculpt the Statue of David.’ And everybody is wondering, ‘What does that look like?’ What you’re doing is helping to develop and shape what the visual aesthetic of that actually looks like. You can consider previs to be your rough draft, go and shoot, and then finalizing what that draft is so you are setting up your finals team for success on the back-end of that.
Sam Keehan, Creative Director, Territory Studio
The most important thing about being a creative director has always been to try as often as I can – whether that be when we’re resourcing projects or hiring people – to surround myself with people who are better than me. There will be particular skills that people will be way better at than me. We can talk, and they can go and enjoy the thing that they’re really good at and come up with interesting stuff. I will be able to sit back and say, ‘Yes. That’s exactly what I was thinking.’ The inherent difficulty is if you’ve got multiple people across multiple jobs. You want to make sure that everyone is getting the best work out, but the only people getting the best work out are the ones getting enough support. For my job, in particular, it feels like a lot of it is facilitation and making sure that people have the support they need to just concentrate on the job that has to get finished.
Stuart Ansley, Lead Texture Artist, Digital Domain
The way I describe being a texture painter is to imagine if you went to a toy model shop, got a figurine or car and have to paint colors and details onto them. Sometimes there is metallic stuff or shiny things and you have to decide what color something is going to be, how reflective it is going to be and how dirty it is going to be. We put in all of those little details. In order to be good at the job, you have to have an eye for color, composition and detail. You have to see the little things. I get into trouble when sometimes I have conversations with people and I zone out and my eyes glaze over. It’s because I’m looking at their forehead pores or the way their eyes wrinkle. My wife will always call me out! Whenever submitting our work for review, we always view it in a turntable so the object itself is turning and the lights are turning around it as well, because it’s so important the way the light scrapes across the surface so that you’re getting the right reflectivity and surface deformation.
Thomas Mouraille, Lead Matte Painter, Wētā FX
In a nutshell, we could group the software we use in three categories. We use the first group for creating 3D assets, the second for assembling scenes and the third for creating and adjusting 2D content. We create 3D elements using software such as Maya, ZBrush, Substance and Mari, as well as Houdini and Gaea for terrain. The scene assembly process is done within Clarisse iFX and Houdini. The 2D elements are created and adjusted using Photoshop and Nuke. When required, we use specific software such as Terragen, Reality Capture or Unreal Engine for bespoke tasks.
The matte painting step represents around 10% to 20% of the entire work we actually produce on a show. The bulk of the work is now done using 3D packages. “Environment/Generalist” would be a more correct name to define what we do. The tools evolve quickly, and the current AI breakthrough will likely bring new tools to our toolbox soon. It is already happening with software like Photoshop and Nuke, which have some AI-driven tools. The real-time engines are also being incorporated into the visual effects industry as a solution to render final pixel. It is something we keep a close eye on, and are slowly integrating in our pipeline.


All photos by Danny Moloshok, Al Seib and Josh Lefkowitz.
Captions list all members of each Award-winning team even if some members were not present or out of frame. For more Show photos and a complete list of nominees and winners of the 22nd Annual VES Awards, visit vesglobal.org.

Nearly 1,200 guests from around the globe gathered at The Beverly Hilton for the 22nd Annual VES Awards.

Actor-comedian Jay Pharoah led the evening as
the VES Awards show host.

VES Executive Director Nancy Ward welcomed guests and nominees.
The Visual Effects Society held the 22nd Annual VES Awards, the prestigious yearly celebration that recognizes outstanding visual effects artistry and innovation in film, animation, television, commercials, video games and special venues, with generous support from our premier sponsor AMD.
Comedian and master impressionist Jay Pharoah served as host of the capacity crowd gala as nearly 1,200 guests gathered at The Beverly Hilton hotel in Los Angeles on February 21st to celebrate VFX talent in 25 awards categories.
The Creator was named the photoreal feature winner, garnering five awards. Spider-Man: Across the Spider-Verse was named top animated film, winning four awards. The Last of Us was named best photoreal episode, winning four awards. Coca-Cola topped the commercial field. There was a historic tie in the Outstanding Visual Effects in a Special Venue Project category with honors going to both Rembrandt Immersive Artwork and Postcard From Earth.
Award-winning actor-producer Seth MacFarlane presented the VES Award for Creative Excellence to legendary actor-director William Shatner. Award-winning VFX Supervisor Richard Hollander, VES presented the VES Lifetime Achievement Award to pioneering VFX Producer Joyce Cox, VES. Award presenters included: The Creator director Gareth Edwards; actors Ernie Hudson, Fortune Feimster, Katee Sackhoff, Andrea Savage and Kiersey Clemons; and Leona Frank, Autodesk’s Director of Media & Entertainment Marketing, presented the VES-Autodesk Student Award.

VES Chair Kim Davidson kicked off the evening by presenting several VES Awards categories.
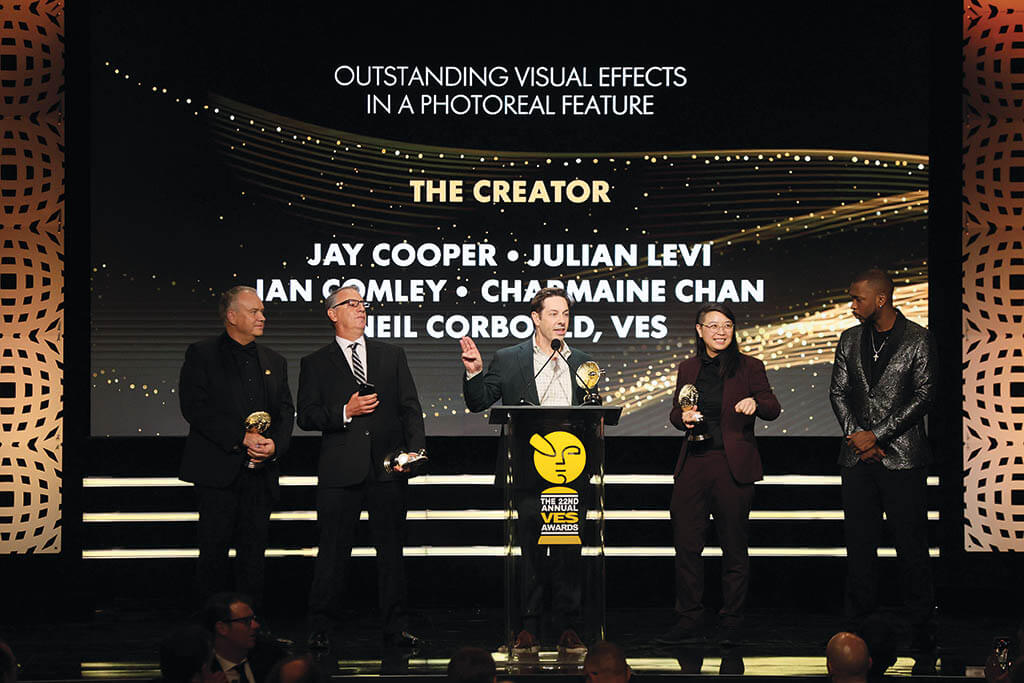
The Award for Outstanding Visual Effects in a Photoreal Feature went to The Creator and the team of Jay Cooper, Julian Levi, Ian Comley, Charmaine Chan and Neil Corbould, VES.
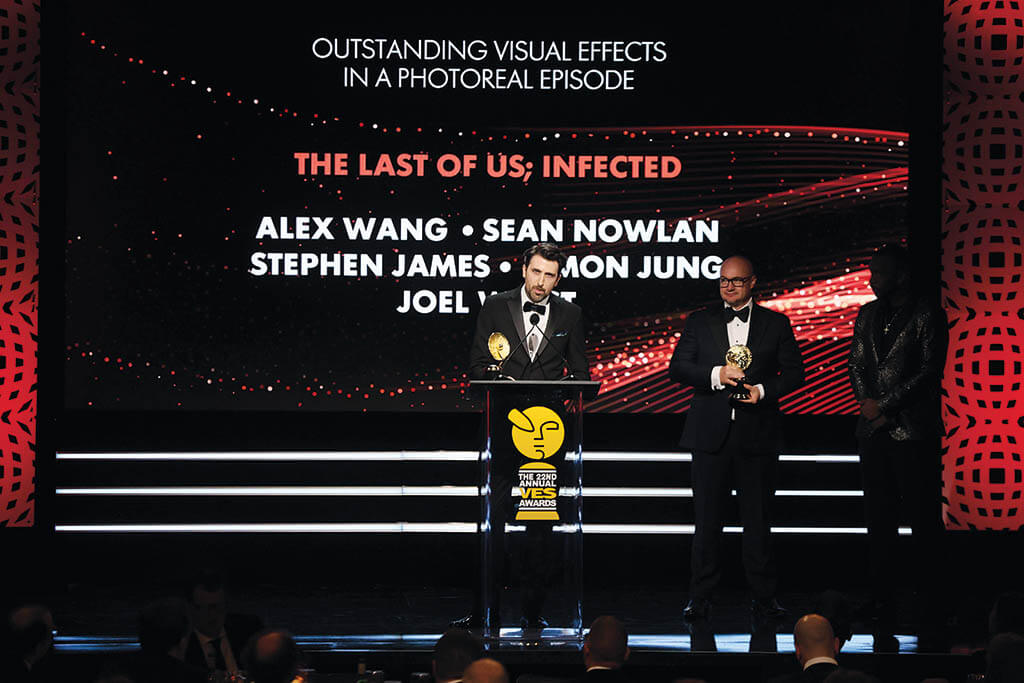
The Award for Outstanding Visual Effects in a Photoreal Episode went to The Last of Us; Season 1; Infected and the team of Alex Wang, Sean Nowlan, Stephen James, Simon Jung and Joel Whist.
The Award for Outstanding Supporting Visual Effects in a Photoreal Episode went to Winning Time: The Rise of the Lakers Dynasty; Season 2; BEAT LA and the team of Raymond McIntyre Jr., Victor DiMichina, Javier Menéndez Platas and Damien Stantina.
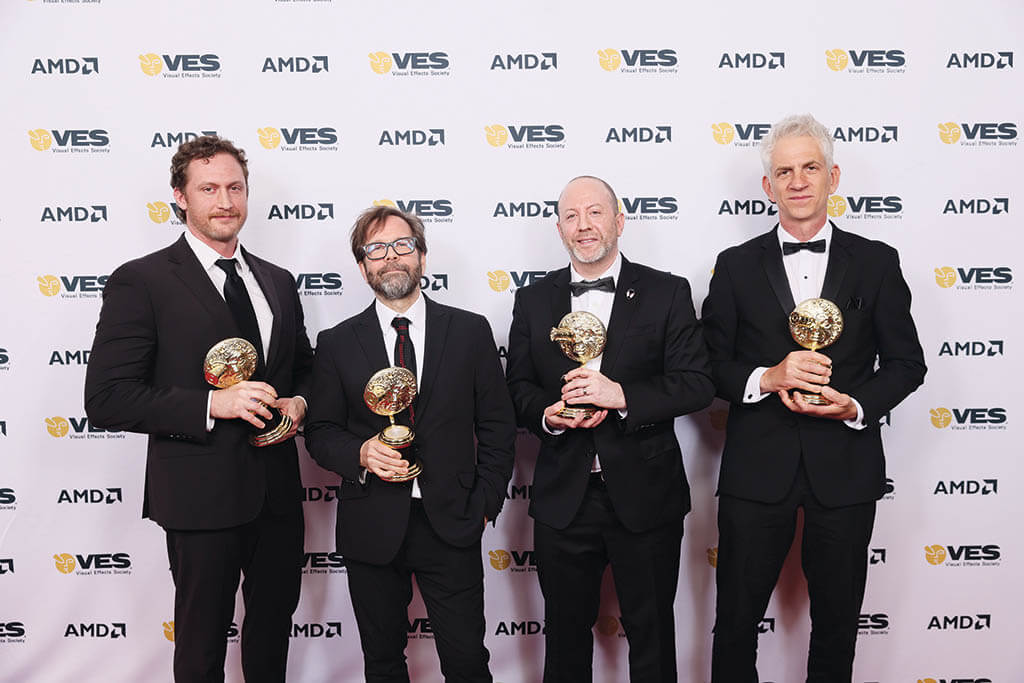
The Award for Outstanding Visual Effects in an Animated Feature went to Spider-Man: Across the Spider-Verse and the team of Alan Hawkins, Christian Hejnal, Michael Lasker and Matt Hausman.

The Award for Outstanding Supporting Visual Effects in a Photoreal Feature went to Nyad and the team of Jake Braver, Fiona Campbell Westgate, R. Christopher White and Mohsen Mousavi.

Actor Ernie Hudson accepted the Award for Outstanding Visual Effects in a Real-Time Project on behalf of Alan Wake 2 and the team of Janne Pulkkinen, Johannes Richter,
Daniel Konczyk and Damian Olechowski.

The Award for Outstanding Compositing & Lighting in a Commercial went to Coca-Cola; Masterpiece and the team of Ryan Knowles, Greg McKneally, Taran Spear, and Jordan Dunstall.

The Creator director Gareth Edwards cheered on the nominees.

Guests enjoyed the festive cocktail reception, thanks to generous support from Premier Sponsor AMD.
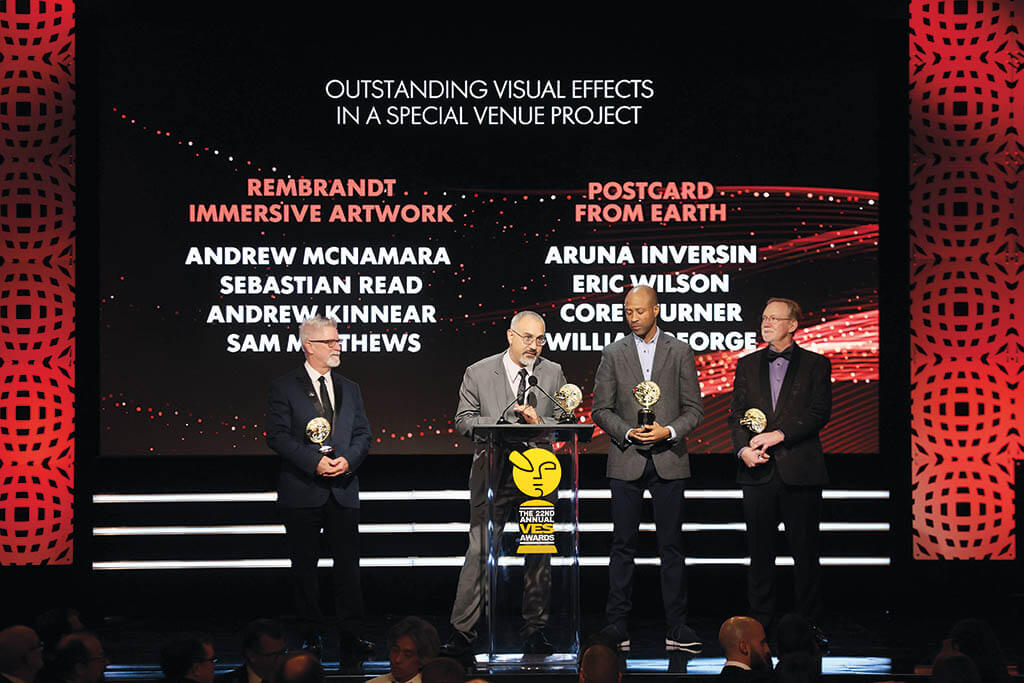
The Award for Outstanding Visual Effects in a Special Venue Project was a TIE and was awarded to both Postcard From Earth and the team of Aruna Inversin, Eric Wilson, Corey Turner and William George (pictured); as well as Rembrandt Immersive Artwork and the team of Andrew McNamara, Sebastian Read, Andrew Kinnear and Sam Matthews (not pictured).

The Award for Outstanding Animated Character in a Photoreal Feature went to Guardians of the Galaxy Vol. 3; Rocket and the team of Nathan McConnel, Andrea De Martis, Antony Magdalinidis and Rachel Williams.

The all-volunteer VES Awards Committee celebrated the success of the 22nd Annual VES Awards Show (Stephen Chiu, Daniel Rosen, Rob Blau, Olun Riley, David “DJ” Johnson, Kathryn Brillhart, Martin Rushworth, Sarah McGee, Den Serras, Lopsie Schwartz, Reid Paul, Sarah McGrail Michael Ramirez, Eric Greenlief, Scott Kilburn).

The Award for Outstanding Animated Character in an Animated Feature went to Spider-Man: Across the Spider-Verse; Spot and the team of Christopher Mangnall, Craig Feifarek, Humberto Rosa and Nideep Varghese.

The Award for Outstanding Created Environment in a Photoreal Feature went to The Creator; Floating Village and the team of John Seru, Guy Williams, Vincent Techer and Timothée

Leona Frank, Director of Media & Entertainment Marketing, Autodesk, presented the VES Autodesk Student Award.
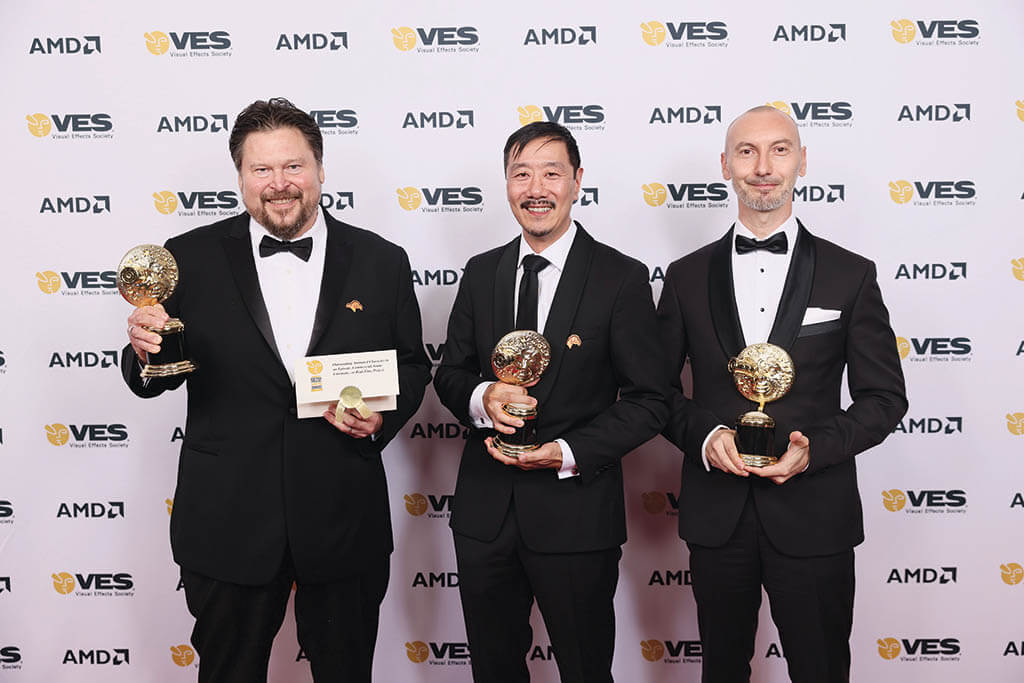
The Award for Outstanding Animated Character in an Episode, Commercial, Game Cinematic or Real-Time Project went to The Last of Us; Endure and Survive; Bloater and the team of Gino Acevedo, Max Telfer, Dennis Yoo and
Fabio Leporelli.

The Award for Outstanding Created Environment in an Animated Feature went to Spider-Man: Across the Spider-Verse; Mumbattan City and the team of Taehyun Park, YJ Lee, Pepe Orozco and Kelly Han.
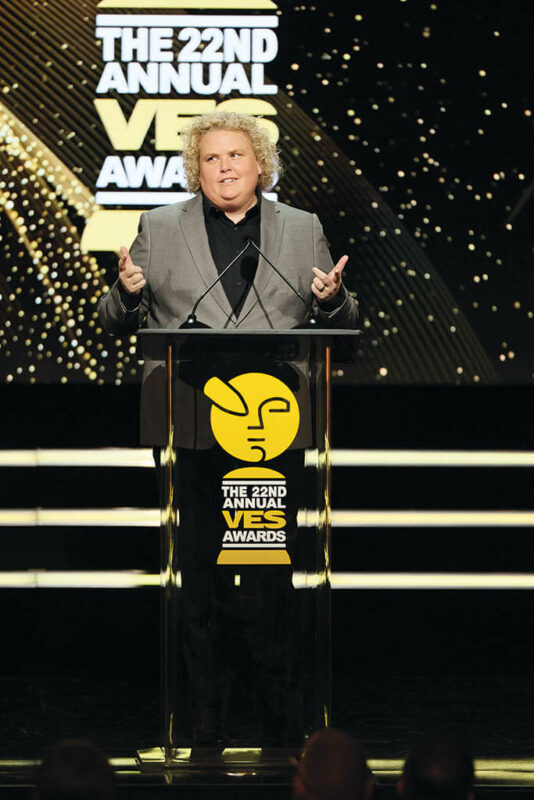
Comedian/ Actress Fortune Feimster brought the laughs to The Beverly Hilton.

Actress Andrea Savage (Tulsa King) presented several Award categories.

Academy Award-winning Senior VFX Producer, Richard Hollander, VES introduced VES Lifetime Achievement Award recipient Joyce Cox, VES.

The Award for Outstanding Virtual Cinematography in a CG Project went to Guardians of the Galaxy Vol. 3 and the team of Joanna Davison, Cheyana Wilkinson, Michael Cozens and Jason Desjarlais.
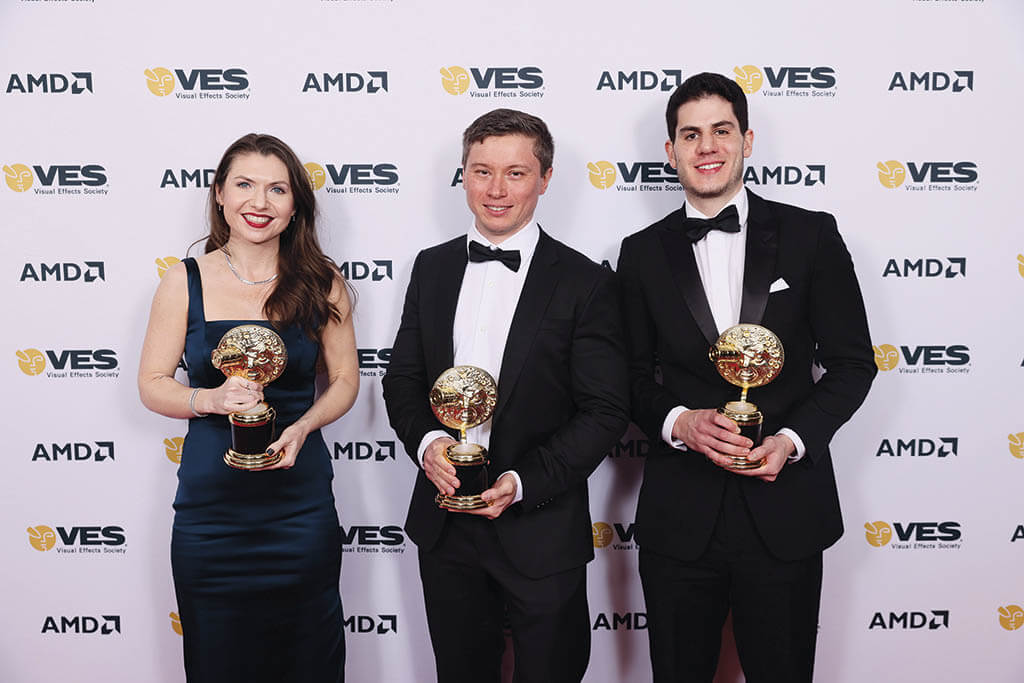
The Award for Outstanding Created Environment in an Episode, Commercial, Game Cinematic or Real-Time Project went to The Last of Us: Post-Outbreak Boston and the team of Melaina Mace, Adrien Lambert, Juan Carlos Barquet and Christopher Anciaume.

Joyce Cox, VES received the VES Lifetime Achievement Award.

The Award for Outstanding Model in a Photoreal or Animated Project went to The Creator; Nomad and the team of Oliver Kane, Mat Monro, Florence Green and Serban Ungureanu.

The Award for Outstanding Effects Simulations in a Photoreal Feature went to The Creator and the team of Ludovic Ramisandraina, Raul Essig, Mathieu Chardonnet and Lewis Taylor.
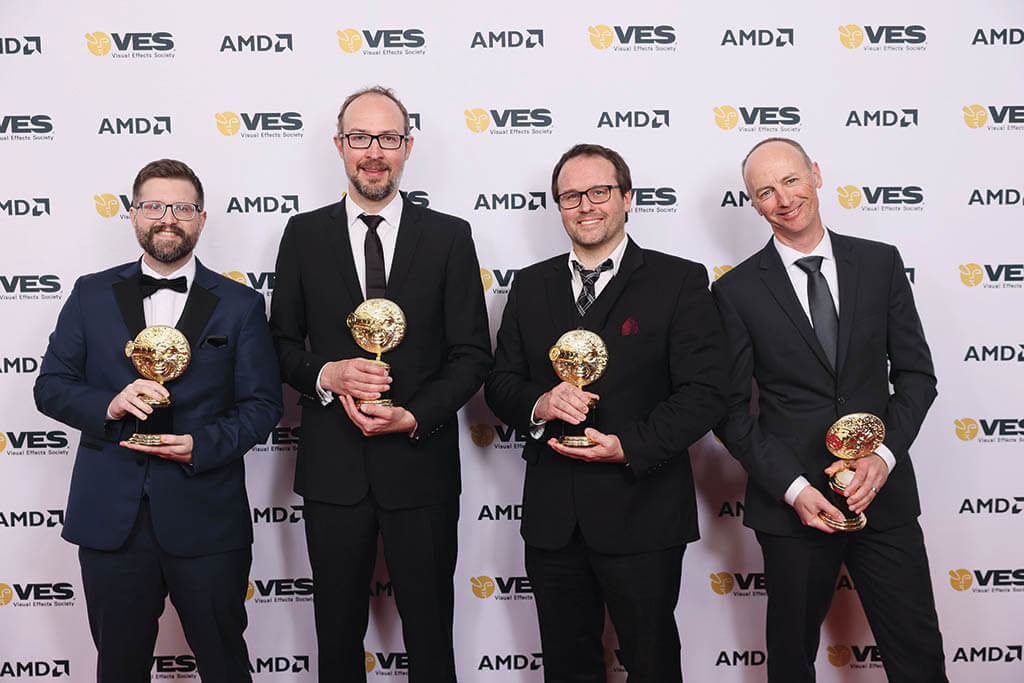
The Award for Outstanding Effects Simulations in an Episode, Commercial, Game Cinematic or Real-Time Project went to The Mandalorian; Season 3; Lake Monster Attack Water and the team of Travis Harkleroad, Florian Witzel, Rick Hankins and Aron Bonar.

The Award for Outstanding Effects Simulations in an Animated Feature went to Spider-Man: Across the Spider-Verse and the team of Pav Grochola, Filippo Maccari, Naoki Kato and Nicola Finizio.

The Award for Outstanding Compositing & Lighting in a Feature went to The Creator; Bar and the team of Phil Prates, Min Kim, Nisarg Suthar and Toshiko Miura.
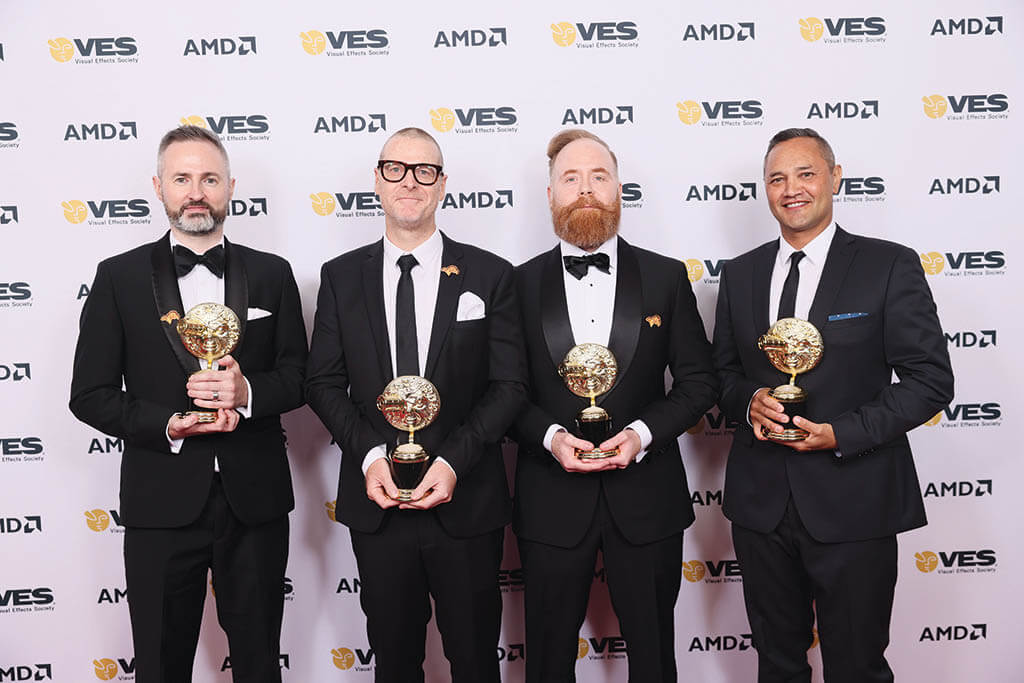
The Award for Outstanding Compositing & Lighting in an Episode went to The Last of Us; Endure and Survive; Infected Horde Battle and the team of Matthew Lumb, Ben Roberts, Ben Campbell and Quentin Hema.
The Award for Outstanding Compositing & Lighting in a Commercial went to Coca-Cola; Masterpiece and the team of Ryan Knowles, Greg McKneally, Taran Spear, and Jordan Dunstall.
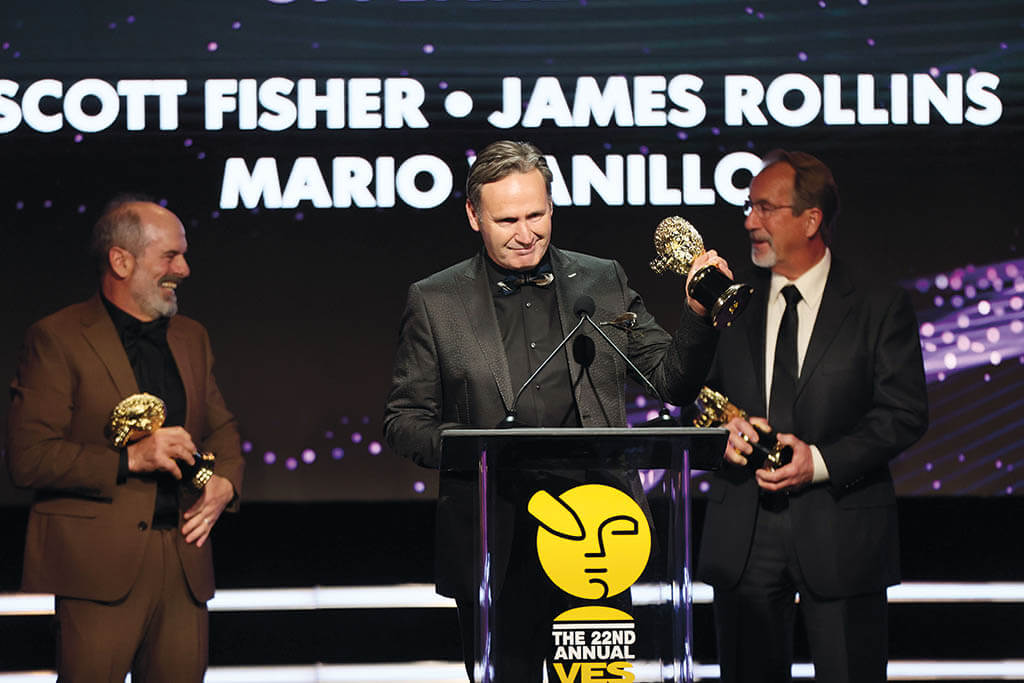
The Award for Outstanding Special (Practical) Effects in a Photoreal Project went to Oppenheimer and the team of Scott Fisher, James Rollins and Mario Vanillo.

The Award for Outstanding Visual Effects in a Student Project (Award Sponsored by Autodesk) was awarded to Silhouette and the team of Alexis Lafuente, Antoni Nicolaï, Chloé Stricher, Elliot Dreuille (with Baptiste Gueusguin).

Actress Kiersey Clemons (Monarch: Legacy of Monsters) joined the show as a presenter.

The VES Emerging Technology Award was awarded to The Flash; Volumetric Capture and the team of Stephan Trojansky, Thomas Ganshorn, Oliver Pilarski and Lukas Lepicovsky.

Seth MacFarlane, award-winning Actor and Creator of Family Guy and The Orville, prepared to present William Shatner with the VES Award for Creative Excellence.

Board Chair Kim Davidson with Lifetime Achievement Award recipient Joyce Cox, VES, VFX Producer Richard Hollander, VES and Executive Director Nancy Ward.

The Creator director Gareth Edwards met up on the red carpet with Takashi Yamazaki, Godzilla Minus One director and VFX Supervisor.

James Knight, left, Global Director, Media & Entertainment Visual Effects, AMD, with director Gareth Edwards.
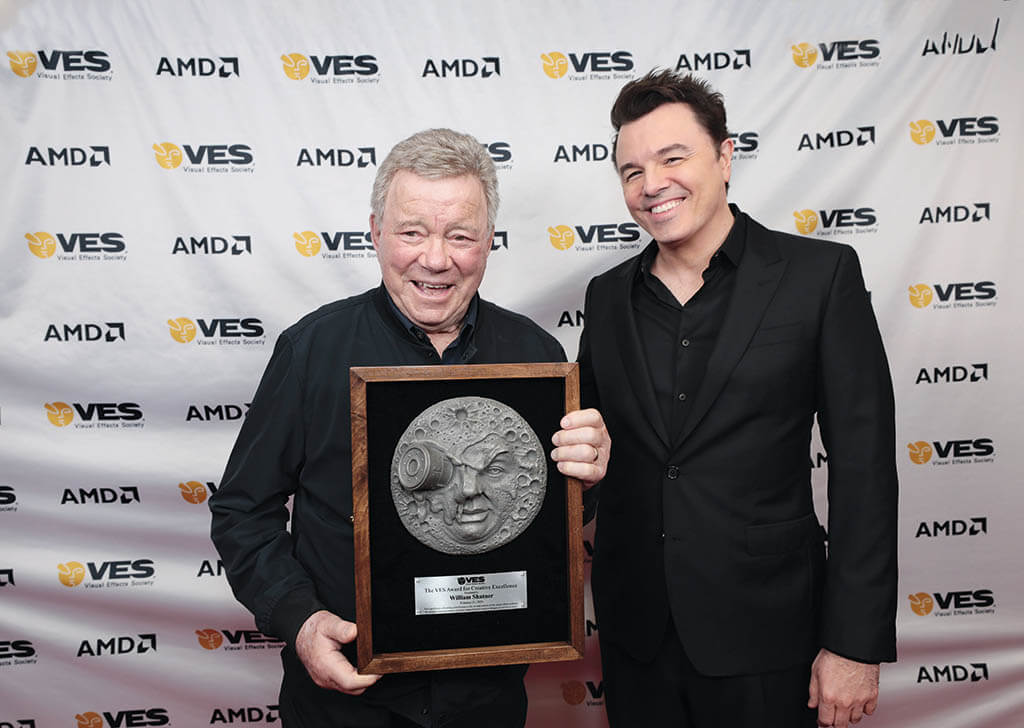
Friends William Shatner and Seth MacFarlane enjoyed a moment together backstage.

Acclaimed Actor, Director and Producer William Shatner received the VES Award for Creative Excellence.

Actress Katee Sackhoff (The Mandalorian) congratulated all the nominees and winners.
THE CREATOR


The VES Award for Outstanding Visual Effects in a Photoreal Feature went to The Creator, which garnered five VES Awards including Outstanding Created Environment in a Photoreal Feature (Floating Village), Outstanding Model in a Photoreal or Animated Project (Nomad), Outstanding Effects Simulations in a Photoreal Feature and Outstanding Compositing & Lighting in a Feature (Bar). (Photos courtesy of Walt Disney Studios)


SPIDER-MAN: ACROSS THE SPIDER-VERSE


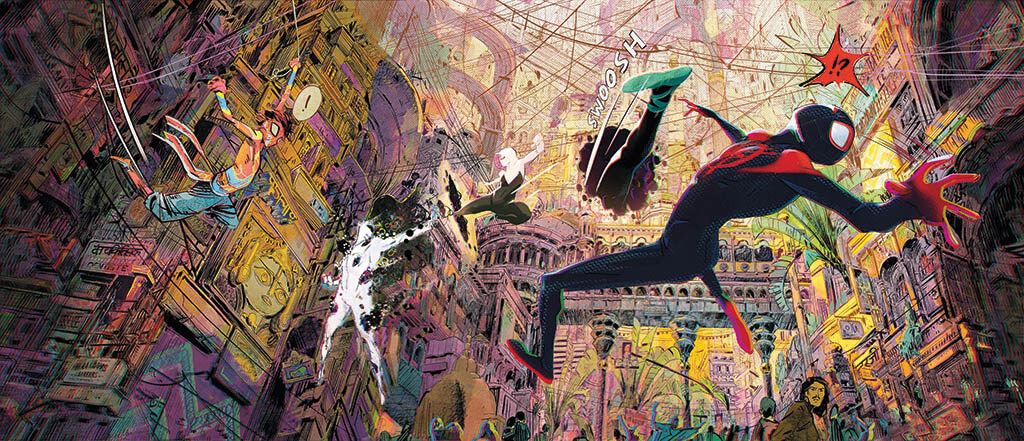
Outstanding Visual Effects in an Animated Feature went to Spider-Man: Across the Spider-Verse, which won four VES Awards including Outstanding Animated Character in an Animated Feature (Spot), Outstanding Created Environment in an Animated Feature (Mumbattan City) and Outstanding Effects Simulations in an Animated Feature. (Photos courtesy of Columbia Pictures/Sony)
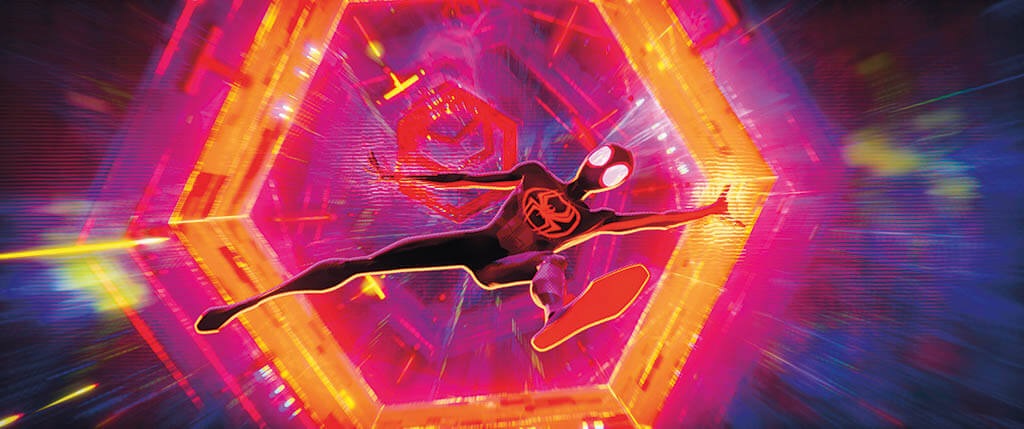

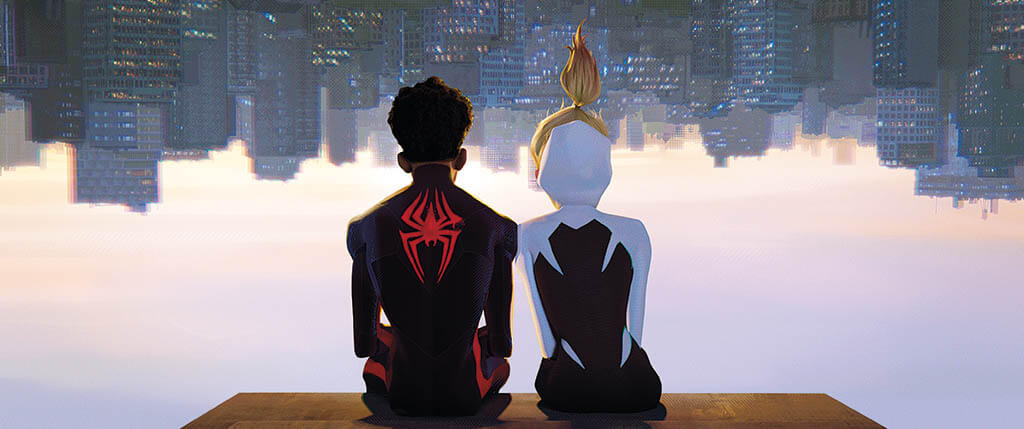
THE LAST OF US

Outstanding Visual Effects in a Photoreal Episode went to The Last of Us; Season 1; Infected, which won four VES Awards including Outstanding Animated Character in an Episode, Commercial, Game Cinematic or Real-Time Project (Endure and Survive; Bloater), Outstanding Created Environment in an Episode, Commercial or Real-Time Project (Post-Outbreak Boston) and Outstanding Compositing & Lighting in an Episode (Endure and Survive; Infected Horde Battle). (Photos courtesy of HBO)


By CHRIS McGOWAN

Toronto-based Herne Hill Media worked on Guillermo del Toro’s Cabinet of Curiosities soon after the firm opened its doors in Toronto. (Image courtesy of Herne Hill Media and Netflix)
Powered by studios in Vancouver, Toronto and Montreal, Canada continues to grow and evolve as a major hub of the global VFX industry. Tax incentives, immigration policy, quality of life, excellent VFX and animation schools and beneficial time zones have all contributed to Canada’s prominence in global VFX. Moreover, a consistent number of Hollywood productions are lensed there, confirming Canada’s reputation as a world-class source of talent and innovation.
“Canada has always been a leader in the industry from the early days of the National Film Board to companies like Alias (now Maya) and SideFX, who have defined the founding principles of VFX and animation,” says Dave Sauro, Partner and Executive Producer at Herne Hill Media, a Toronto studio founded in 2021. “Canada has become a center of excellence not just for VFX, but also for film production in its entirety. Whatever is scripted, we can bring it to life.” Herne Hill worked on Guillermo del Toro’s Cabinet of Curiosities soon after the firm opened its doors. Sauro notes, “We are currently in various states of post-production on a few different projects, including In the Lost Lands, which is an adaptation of a George R.R. Martin short story directed by Paul W.S. Anderson.” The firm is also finalizing Lee Daniels’ The Deliverance and The First Omen.
On the other hand, perhaps Canada’s VFX success “has got something to do with the long, cold, dark winters?” asks Shawn Walsh, Visual Effects Executive Producer, General Manager & Cinesite Group Chief Operating Officer VFX at Image Engine. Founded in Vancouver in 1995, Image Engine merged with Cinesite in 2015. “When you spend a good deal of time indoors following your passions, that creates a kind of fertile ground for the focus, creativity, technical knowledge and innovation that high-end visual effects require. It seems to me that Canadians have never been shy [about] a little hard work either! Canadians have had a strong presence in Hollywood, animation and visual effects for a very long time.”
In recent years, Image Engine has worked on a healthy mixture of high-end series like Game of Thrones, The Mandalorian, 3 Body Problem and Lost in Space as well as the Fantastic Beasts films, Mulan and District 9, Elysium and CHAPPiE for director Neill Blomkamp, and Zero Dark Thirty for director Kathryn Bigelow.
COMPUTER ANIMATION
“Canada has always been a front-runner when it comes to computer animation. Maya, and Softimage before Maya, began in Canada. Canadians filled many of the earliest positions because we were more familiar with the software and skills needed for those early films and TV shows,” says Scott Thompson, CEO and Co-Founder of Think Tank Training Centre in Vancouver. “That legacy helped Canadian schools better address the positions made available at studios that have settled north of the border.”
SideFX, co-founded in Toronto in 1987 by current President Kim Davidson, used its software, PRISMS, to lay the groundwork for Houdini. SideFX technology has been recognized by the Academy of Motion Picture Arts and Sciences five times for Houdini and its breakthrough procedural-based technology. Numerous VFX studios working on Oscar-winning and/or blockbuster films have used the software.
With its flagship product Houdini, SideFX has been a key driver in the growth and innovation of the Canadian VFX industry, particularly in Toronto,” comments Christopher Hebert, SideFX Senior Director of Marketing. The company’s work “has led to significant advancements in VFX and animation, making Houdini a staple in many studios and pushing the boundaries of visual effects capabilities. This influence extends to job creation and talent development, with SideFX employing a significant portion of its workforce in Canada. Their contribution to the software development ecosystem – as well as initiatives like the Houdini Internship Program – not only supports the local economy but also ensures a high level of VFX expertise within the country, fostering a robust and skilled VFX workforce.”
Also in Canada, Alias Research launched in Toronto in 1983 and Softimage in Montreal in 1986, eventually resulting, after various acquisitions and mergers, in (Autodesk) Maya, the award-winning, widely-used 3D model and animation software. In 2003, Alias was given an Academy Award for Technical Achievement for the development of Maya software.

Image Engine Design in Vancouver has been a key contributor to the Netflix series 3 Body Problem.
(Image courtesy of Netflix)

Recent projects for Montreal-based Raynault VFX include Secret Invasion Season 2 for Disney+ as well as Percy Jackson and the Olympians, All the Light We Cannot See, White Noise and Fantastic Beasts: The Secrets of Dumbledore. (Image courtesy of Raynault VFX and Disney+)

MARZ in Toronto contributed VFX to Moon Knight as well as WandaVision, Ant-Man and the Wasp: Quantumania, Spider-Man: No Way Home, Wednesday, Stranger Things and the Percy Jackson series. (Photo: Gabor Kotschy. Courtesy of Marvel Studios)

Canada’s early animation and VFX software legacy and long history with Hollywood have helped Canadian film and VFX schools, like the Think Tank Training Centre in Vancouver, consistently address the need for talent to fill available positions at studios.
(Image courtesy of Think Tank Centre)
When new computer animation tools arrived, Canada’s art schools began “modifying their classical curriculums by adopting tech,” explains Lon Molnar, Co-Founder of MARZ, a VFX studio that launched in Toronto in 2018. “In the early days, Sheridan College outside of Toronto became a world-renowned leader for animation due to its talented faculty. In the ’90s, schools like Vancouver Film School built a reputation for training traditional and computer animation while cranking out amazing talent – and still do. The Canadian Government along with certain territories jumped on board and supported the industry with various incentives. Filmmaking in Canada as a stand-in for various locations grew while solid investment in soundstages in centers like Vancouver, Toronto and Montreal followed the demand.
Add all this up and eventually you have a vibrant industry with a reputation to deliver.” MARZ contributed VFX to projects such as WandaVision, Moon Knight, Ant-Man and the Wasp: Quantumania, Spider-Man: No Way Home, Wednesday, Stranger Things and the Percy Jackson series.
“[I]t’s hard to imagine a more multicultural, multinational visual effects company than a Canadian one. Canada has always been a tremendous draw for immigration, and the visual effects industry has been a strong contributor to that story. It seems like Canada has found the right soupy mixture of various factors that have created an environment that supports the talent that’s so crucial to visual effects work. The job now is to continue to grow that talent base through continuing immigration, creative and technical development opportunities and strong industry leadership.”
—Shawn Walsh, Visual Effects Executive Producer & General Manager, Image Engine
CONTINUED TRAJECTORY
The acceleration of the visual effects industry in Canada over the last 25 years or so can also be attributed to “gradual factors such as the introduction of tax incentives in the late 1990s, strategic investments in education and the establishment of high-quality studios in cities like Vancouver and Montreal,” says Valérie Clément, VFX Producer for Raynault Visual Effects. In addition, Clément observes, “The boom in film and TV production in Canada has significantly boosted the exposure and vigor of the VFX and animation industry at large by creating increased demand for services, ensuring a steady flow of projects, fostering collaboration opportunities, contributing to the economy, driving talent development, gaining global recognition and spurring technological advancements.”
Clément points out, “Of course, the government incentives – generous tax credits, for example – played a huge role. There is also the skilled workforce, the strong infrastructure with more and more visual effects studios located mainly in Montreal, Vancouver and Toronto.” Clement’s firm, Raynault VFX, was founded in Montreal in 2011 by industry legend Mathieu Raynault, He surrounded himself with a small, select team of artists and grew the studio into a full-service VFX facility. Some 2022-2023 projects have included Percy Jackson and the Olympians, All the Light We Cannot See, White Noise, His Dark Materials, Season 3, Thor: Love & Thunder, Fantastic Beasts: The Secrets of Dumbledore, The Old Man and Invasion. Clément also emphasizes the advantage of Canada’s time zones compared to those of Hollywood. There is a limited or non-existent time difference, such as Vancouver sharing the same time zone as California as opposed to London being eight hours later.
Ryan Stasyshyn, Managing Director of Toronto-based Mavericks VFX, cites these reasons for Canada’s VFX success: generous tax incentives and rebates offered by various provinces, a skilled workforce, strong government support, a favorable exchange rate (vs. USD) and, as Clement notes, a significant amount of physical production taking place in Canada. Recent high-profile projects for Mavericks VFX are John Wick: Chapter 4, The Handmaid’s Tale, Fargo, Fellow Travelers, The Offer, Don’t Worry Darling, The Boys, The Expanse and Halo.

Recent high-profile projects for Toronto-based Mavericks VFX include John Wick: Chapter 4 as well as Fargo, Fellow Travelers, The Offer, Don’t Worry Darling, The Boys, The Expanse and Halo.
(Image courtesy of Lionsgate)

Toronto-based Mavericks VFX contributed VFX to the Hulu series The Handmaid’s Tale. (Image courtesy of Hulu)
TIPPING POINT – VANCOUVER
Walsh notes, “I think a key turning point in Vancouver’s history as a hub for high-end visual effects work was when Image Engine completed our work for Neill Blomkamp’s District 9 at more or less the same time that [Vancouver-based] The Embassy did some stunning work for Marvel’s first Iron Man and MPC created some solid work for Watchmen. I think this was around 2008-2009. This was the first time that Vancouver visual effects studios, broadly speaking, were really producing work that was the equal of any location, any company in the world. In fact, District 9 was the only project to beat Avatar in any category at the VES Awards that year! The town really grew from that point on. We were on the map, as they say. Since then, Vancouver has gone from strength to strength and has continued to lead the Canadian scene.”
LIFE PERKS
There are many advantages to living in the three major Canadian cities. In Toronto, Stasyshyn notes, “We have a vibrant cultural scene that’s extremely diverse. It’s also a very welcoming city with lots to explore and do.” Clément notes, “[Artists] also have access to all the perks of working and living in Canada: good quality of life, high living standards and a safe environment with the emphasis on a healthy work-life balance.”
Sauro also points to the opportunity to live and work in different parts of Canada. “Vancouver, Toronto and Montreal are all important VFX hubs in the Canadian market, and each offer something different from a lifestyle perspective. Whether it’s the great outdoors of Vancouver, the big city living of Toronto or the European feel of Montreal with its excellent restaurants, each can allow you to not only earn a living doing what you love, but also live in a city that best fits your interests outside of work,” he explains.

In addition to Guillermo del Toro’s Cabinet of Curiosities, Toronto-based Herne Hill Media is involved in In the Lost Lands, which is an adaptation of a George R.R. Martin short story directed by Paul W.S. Anderson, as well as Lee Daniels’ The Deliverance and The First Omen. (Image courtesy of Herne Hill Media and Netflix)

MARZ in Toronto provided VFX for Spider-Man: No Way Home. (Photo: Matt Kennedy. Courtesy of Marvel Studios)

Image Engine Design in Vancouver has worked on the Fantastic Beasts films, including Secrets of Dumbledore, and high-end series such as Game of Thrones, The Mandalorian, 3 Body Problem and Lost in Space. (Image courtesy of Warner Bros. Pictures)

Image Engine Design in Vancouver provided VFX for Venom: Let There Be Carnage. (Image courtesy of Columbia Pictures/Sony and Marvel Studios)

Image Engine Design provided VFX for 3 Body Problem. (Image courtesy of Netflix)

Montreal-based Raynault VFX contributed to FX Network series The Old Man. (Image courtesy of Raynault VFX and FX Network)
BENEFITS & SUPPORT
In addition, “Employment standards in visual effects companies across Canada are generally very high,” Walsh notes. Wages are generally on par with anywhere in the world that’s doing equivalent levels of quality of execution. Aspects like healthcare and benefits again are on par or above those offered in other visual effects hubs around the world. And there’s a broadly diversified industry with many different companies in terms of shapes, sizes and focuses. [For artists], Canada represents a prime location to consider plying your trade.”
“Canada has a government that understands the importance of supporting the arts,” Sauro says. Part of that help comes in support for non-Canadians studying and working in VFX. Walsh notes that Canada “is a relatively open country that supports companies towards their immigration needs.” Aline Ngo, Image Engine recruiter, notes the importance of “facilitating the retention of skilled talent in Canada.” She says that enabling the stays of visual effects graduates with a government visa help is key. One path is “the possibility of getting a three-year post-graduate work permit after graduating.”
INCENTIVES
“Government support has played a pivotal role in Montreal’s VFX industry success,” Clément comments. “Generous tax incentives and subsidies attract studios, fostering growth. Investment in infrastructure and education ensures top-notch facilities and a skilled talent pool. In essence, government backing has been instrumental in shaping Montreal into a VFX pole.”
Walsh comments, “There’s great local support for the industry in the three main cities where the majority of the visual effects work transpires – Vancouver, Montreal and Toronto. Labor-based tax credit regimes certainly don’t hurt when attracting the client base, but without the talent to execute the work, no amount of tax credit will matter.” Likewise, Sauro affirms, “We can’t ignore the obvious benefits tax credits play, both at a provincial and federal level, in attracting studios and producers to Canada, but that alone is not enough.”
“When you look at the post-secondary institutions in this country, we’re fortunate to have some of the best for VFX, animation and design: OCAD University, Sheridan College,
Humber College, Vancouver Film School, etc. It’s an embarrassment of riches.”
—Dave Sauro, Partner and Executive Producer, Herne Hill Media
SCHOOLS
VFX and animation schools have also helped build the industry. Sauro comments, “When you look at the post-secondary institutions in this country, we’re fortunate to have some of the best for VFX, animation and design: OCAD University, Sheridan College, Humber College, Vancouver Film School, etc. It’s an embarrassment of riches.”
Stasyshyn points to Seneca College, Sheridan College and Vancouver Film School (VFS) as some of the top VFX and animation schools in Canada. “These schools have played a crucial role in shaping the skills of the Canadian VFX workforce. Their programs often include hands-on training, industry connections, networking events and exposure to some of the latest technologies.”
For SideFX, “The proximity to top-tier educational institutions – like the University of Waterloo and the University of Toronto, renowned for their software development and graphics labs, and colleges like Sheridan College, known for its CG education – ensures a steady stream of skilled graduates and potential innovations in VFX technology,” says Hebert. Clément adds, “In Montreal, the VFX talent pool has expanded through esteemed educational institutions like NAD [The School of Digital Arts, Animation and Design] providing industry-relevant education. The establishment of major VFX studios has also significantly expanded career opportunities for local artists.”
Noteworthy Canadian VFX/animation schools also include public schools Emily Carr University of Art and Design, Langara College, British Columbia Institute of Technology (BCIT) and Capilano University and private institutions like Lost Boys School of Visual Effects, Think Tank and Vancouver Film School (VFS), according to Ngo.
“Government support has played a pivotal role in Montreal’s VFX industry success. Generous tax incentives and subsidies attract studios, fostering growth. Investment in infrastructure and education ensures top-notch facilities and a skilled talent pool. In essence, government backing has been instrumental in shaping
Montreal into a VFX pole.”
—Valérie Clément, VFX Producer, Raynault Visual Effects
“With a focus on story and problem-solving, we have been serving our industry with students who are prepared for an adaptable career in VFX,” says Colin Giles, Head of the School for Animation & VFX at Vancouver Film School. “Given the rapid changes in techniques and technology, we continue to upgrade our facilities and curriculum to not only stay in tune with current methodologies, but prepare our students on why these changes can enchant their storytelling and help them find their artistic voice.” Thompson remarks, “Canadian-based studios have a substantial piece of the VFX pie, so students are very close geographically to their first VFX job. These studios also give Canadian schools access to instructors and mentors that are working on the biggest VFX films and TV shows being made. At Think Tank, we are continually polling the industry to better understand the software, workflows and demands of the FX industry.”

Vancouver Film School continues to upgrade its facilities and curriculum to stay in tune with current methodologies and better prepare students for the evolving industry.
(Image courtesy of Vanouver Film School)

Think Tank Training Centre in Vancouver is among the wealth of animation and VFX schools in Canada developing a steady stream of creative and technical talent that keeps the industry growing. (Image courtesy of Think Tank Centre)
Canadian VFX/animation schools work hard to stay in demand and stay in touch with the VFX companies. Lost Boys Co-Founder and Director Ria Ambrose Benard comments, “We were the first school to teach Houdini for FX and Katana for lighting. This helped our students stay ahead of the curve and in demand when the industry was growing. The FX program and the lighting program were designed at a request from the studios in the industry years ago.” Giles notes, “The growing talent pool is being fueled by high school interest, and international students are attracted to animation schools across Canada. This has allowed the VFX industry to tap into deep tax credits and build a sustainable nationwide industry. In addition, like VFS, we are able to bring in top instructors and mentors from the expanding VFX footprint.”
Walsh continues, “Bringing visual effects work north seems to have been a natural progression. Initially, many of us left home to work abroad because that’s what you had to do to experience working on the visual effects shots that captivated our attention. However, there was a turning point around the late 2000s when many of us returned home and brought our new-found friends from around the world with us! Since then, it’s hard to imagine a more multicultural, multinational visual effects company than a Canadian one. Canada has always been a tremendous draw for immigration, and the visual effects industry has been a strong contributor to that story. It seems like Canada has found the right soupy mixture of various factors that have created an environment that supports the talent that’s so crucial to visual effects work. The job now is to continue to grow that talent base through continuing immigration, creative and technical development opportunities and strong industry leadership.”
VFX STUDIOS
Other notable Canadian VFX/animation firms include Spin VFX (Toronto), Rocket Science VFX (Toronto), Rodeo FX (Montréal, Québec City, Toronto), Soho VFX (Toronto), Guru Studio (Toronto), Folks VFX (Toronto), Zoic Studios (Vancouver), The Embassy (Vancouver), Hybridge Ubisoft (Montréal), Artifex Animation Studios (Montréal) and Alchemy 24 (Montréal).
Branches of foreign VFX and animation companies have also contributed to Canada’s growth in visual effects. Vancouver has outposts of Wētā FX, ILM, Framestore, DNEG, Pixomondo, Sony ImageWorks, Walt Disney Animation Studios, Digital Domain, Crafty Apes VFX, FuseFX, Scanline VFX (owned by Netflix), Ghost VFX, Luma Pictures, Clear Angle Studios, Animal Logic, CoSA VFX, Barnstorm VFX and Ingenuity Studios, among others.
Montréal branches include Framestore, DNEG, Pixomondo, Sony ImageWorks, MPC (Technicolor), Mikros Animation (Technicolor), Digital Domain, Mathematic Studio, Crafty Apes, Folks VFX (Fuse Group), Outpost VFX and Scanline VFX. Toronto facilities include DNEG, Tippett Studio and Ghost VFX, among others.
By OLIVER WEBB

Marianne Speight, Chief Business Development Officer and Executive Producer, Milk VFX. (Photo: Simon Wicker)
Marianne Speight was born in Stockton-on-Tees in the North East of England but lived in New Zealand for a few years. Besides studying specific university courses, Speight didn’t receive any formal VFX training. “I wasn’t aware of any training availability when I started,” Speight says. “Mainly, it was on the job with artists/supervisors and producers passing on their knowledge to me on a daily basis. The only course I did take was compositing basics at Escape Studios as I wanted to learn what the compers were talking about with regard to various lighting and comp passes they needed when I was a coordinator.”
Speight broke into the visual effects industry after joining Peerless Camera Company. “Terry Gilliam had just started his film The Brothers Grimm at that time, so it was an exciting time to start my VFX journey – and a steep learning curve! I loved visual effects in Star Wars but had little concept of how VFX effects were actually made,” Speight notes. “It was really exciting having direct access to the filmmaker and learning how creative feedback would affect asset builds or shot composition and in turn what the impact on the schedule would be. Mostly, though, it felt like we were very connected to the creative process and the director’s vision, which was inspiring. It was also intriguing to work with a lot of very experienced artists who were happy to share their knowledge and also some amazing stories from the days of optical printers.”
Speight was very interested in the production budget/scheduling side of the effects from the beginning, and Peerless owner Kent Houston encouraged her to go in that direction. Speight served as Visual Effects Coordinator on the 2005 film Racing Stripes. “Racing Stripes was fascinating to me as a new coordinator because it had so many parts of the VFX process involved. So, it was a good learning experience to get me used to many parts of the process for muzzle replacements and full CG animals,” she explains. “I learned a lot about dependencies on different areas such as prep animation lighting and comp. I especially enjoyed watching the animators pull faces into a mirror and recreate those on the zebra! It gave me a good grounding to know how long different parts take and what can speed up or slow down the schedule.”

Speight was looking to expand her experience on challenging projects in terms of volume and complexity, and found both working on The Chronicles of Narnia: The Voyage of the Dawn Treader (2011). (Image courtesy of 20th Century Fox and Walden Media, LLC)
When Speight first joined MPC in 2009, she was already established as a visual effects producer, but was looking to take her career in a new direction. “I was looking to expand my experience on challenging projects in terms of volume and complexity, and I enjoyed The Chronicles of Narnia: The Voyage of the Dawn Treader, which had both. It was a fun and technically challenging show. It was my first experience working with CG water simulation and rendering. Back then, Flowline was the software of choice, and that presented its own set of challenges since simulation and render times were evolving during production. It was also a heavy creature and animation show, and I loved being involved in the development process of the creatures from initial concept to final shots. The show itself was quite an eclectic mix of challenges, but it was a really fun film to work on as there was a great team across the board and a collaborative client.”
Among Speight’s other credits as a Visual Effects Producer is X-Men: First Class. “I loved working on X-Men: First Class. It wasn’t a huge volume of shots, 200 max, but it was complex work with a host of separate technical and artistic problems to solve,” Speight remarks. “I particularly liked the Hank [McCoy] beast transformations involving muscle deformations and fur appearance/disappearance. It was a real challenge for rigging and groom, and it felt like we were learning a lot throughout the process in terms of how we developed our approach to using software. It was fun working with the creative team led by [MPC Visual Effects Supervisor] Nicolas Aithadi on this one as everyone loved the franchise. I also got to work with [Visual Effects Designer] John Dykstra. That was a huge honor to work with a VFX legend.”
As a new coordinator on Racing Stripes, Speight was introduced to many parts of the VFX process, including muzzle replacements and full CG animals, as well as to factors that impact a production schedule.
(Photo: Alsbirk, Blid. Courtesy of Warner Bros. Pictures)

Speight began her visual effects career on Terry Gilliam’s The Brothers Grimm (2005). (Image courtesy of Dimension Films and MGM)

X-Men: First Class didn’t involve a large volume of shots, but Speight found it was complex work with a host of separate technical and artistic problems to solve.
(Image courtesy of Marvel Studios)
Speight currently serves as Chief Business Development Officer and Executive Producer for Milk VFX. “I always admired Milk while working at other companies. They always had a talented team, and I was a fan of their creature work and their ability to be involved in a wide range of projects. Milk has always had a strong client base for repeat business, and when I came in, my goal was to expand that client base and reinforce our connections in the industry and with filmmakers and showrunners. I enjoy working with clients to break down scripts and work out methodologies that are going to give the look they want but also within their budget. We always want to be with clients, working to help them develop their ideas and inform their creative process. We are working to expand our client base to a more global reach while still offering a very personal interaction with our clients. As part of this, Milk now has studios in Bordeaux, Barcelona and Dublin, and it’s great to be able to access the range of talented artists in those areas. We are a full-service VFX house with very strong FX and environment teams, but our continuing specialization is creatures, so we are looking to develop that even further. In my role as Executive Producer, I also oversee projects from the bid stage through award through shot delivery. It’s great to have that continuity and to see how the ideas, assets and shots have evolved and all the various creative twists and turns it may have taken. It’s always very satisfying to see your work on the big screen!”

It was a career highlight for Speight to work with Ridley Scott on Prometheus (2012). (Image courtesy of Twentieth Century Fox)

Speight’s favorite shot from her career was the sequence of the Juggernaut crash from Prometheus as it was quite an epic build and a landmark part of the film. (Image courtesy of Twentieth Century Fox)
When it comes to selecting a favorite visual effect shot from her career, Speight is quick to point to one shot in particular. “My favorite shot from my career is probably actually a group of shots, which I guess is cheating, but it was the sequence of the juggernaut crash from Prometheus as it was quite an epic build of the asset and a landmark part of the film,” Speight says. “It was a huge asset, and the textures needed to be very high-res as they were coming very close to the camera. The animation and FX also had to be spot on to make the weight of the ships and crash believable so the audience felt how vast it was. It was a great sequence to develop as I’m a big fan of Ridley Scott. It was pleasing to develop that with him and see how happy he was with it.”
Choosing an overall project that she is most proud of is more of a daunting task for Speight. “It’s a tough choice on which project I’m the most proud of,” Speight notes. “I think in terms of my early career I was most proud of Casino Royale because I always wanted to work on a Bond film. I also was just very proud of getting that one delivered in a short space of time, comparatively speaking. It involved a range of visual effects from environment extensions to face replacements. It was a great project to work on. I particularly liked the crane sequence we did with Daniel Craig.”
“However, I think my favorite project they worked on was Guardians of the Galaxy because it was just such a big film with just so many different sequences requiring different elements, different characters that we needed to do,” Speight continues. “MPC and Framestore were building their own assets for Rocket and Groot, and they had to match exactly. Both used some proprietary software, so it was kind of ‘how do we make assets match while we are both building at the same time with our own setups?’ But I think everyone worked together really well. It was a good example of studios working together to get the best outcome for the film. I loved the process of building Groot as that was complicated from a rigging perspective, and groom was a challenge for Rocket, but the biggest one was making both characters ‘real,’ and I think the animators did a fantastic job. The spaceship fights were cool to work on both in terms of animation and in terms of having massive ships with an immense polygon count to render. There were just so many different stand-alone sequences over the project; it wasn’t like there was much repeating in terms of effects requirements, so that’s really challenging but satisfying to do. A lot of that fun came down to the team – they were brilliant, and I loved how well everyone worked together.”

Casino Royale involved a range of visual effects from environment extensions to face replacements, and Speight was proud of delivering a complex project in a comparatively short period of time. (Image courtesy of Columbia Pictures/Sony)

Guardians of the Galaxy was a “big film” in Speight’s career for its vast scope of demands because it was filled with many different sequences requiring different elements and different characters that needed to be realized. (Image courtesy of Marvel Studios and Walt Disney Studios)

Speight cites Guardians of the Galaxy as a good example of studios working together to get the best outcome for the film. (Image courtesy of Marvel Studios and Walt Disney Studios)
Technology-wise, the VFX industry is ever-evolving and has developed since the beginning of Speight’s career. “Certainly, when I first started my career it felt as though there was a new development monthly in terms of software, pipeline and hardware that could be used,” Speight details. “It has always been a very fascinating industry to be in. When faced with technical and creative challenges that haven’t been solved before, it is always incredible to see technical and artistic talent within our industry take on those challenges so readily and design and build something that works. During my career, we went from shooting on film to digital to LED walls, virtual production and virtual scouting, and I think those technical technological updates have been great for showrunners and filmmakers to give them all the tools they need to achieve their vision in a way that embraces VFX and how it can work for them. Having a facility that can consult early on to get the best possible outcome for their project is crucial, and I think we want to always try and advise on what tools could help them.”
In terms of inclusivity within the industry, Speight explains that it is an area that can always be improved, but the industry is heading in the right direction. “There is a lot more to be done to achieve a more diverse workplace through targeted recruiting and outreach to individuals and groups that wouldn’t necessarily have considered VFX as an option open to them due to its previously atypical demographic. For me, flexibility has led to inclusivity as a Mum, and it’s been great to be able to carry on with my career progression and have a family. It’s crucial for me to have a level of flexibility to be able to perform at the highest level, and there’s been a move towards flex and hybrid working in recent years, so I can juggle the needs of my family and the needs of the company. I feel that the industry is now more and more recognizing the benefits of that as it is retaining very experienced and talented crew who also want to have balance in their lives while working on some cool projects!”